
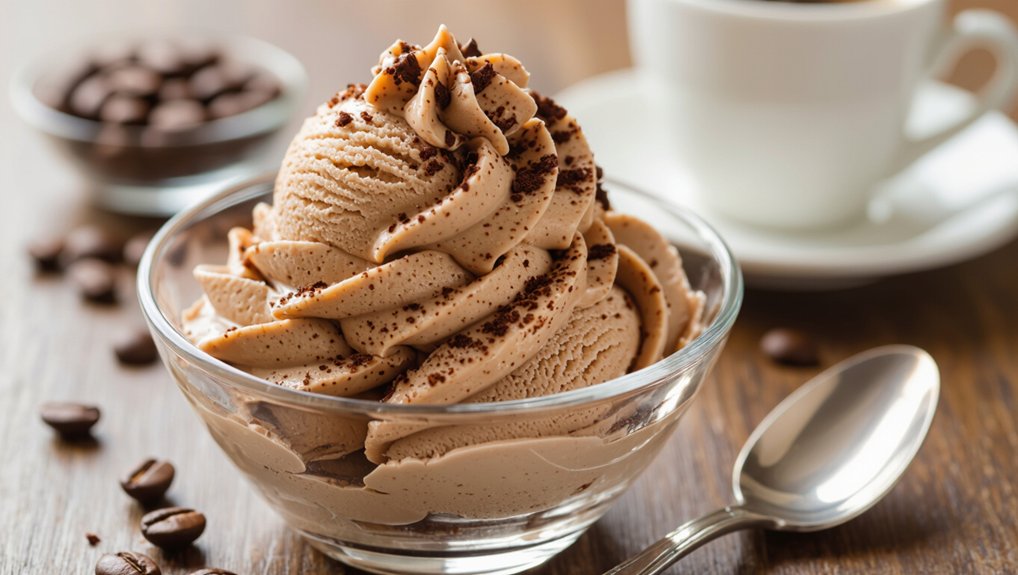
If you’re looking to create a dessert that perfectly balances rich coffee flavor with creamy texture, Velvet Coffee Ice Cream Bliss might just be what you need. You’ll blend heavy cream, whole milk, and brewed coffee, and you can even add egg yolks for extra depth. But there are some essential tips to get that smooth, velvety finish. Let’s explore the steps and secrets that will elevate your ice cream game.
What Is Velvet Coffee Ice Cream?
When you think about a delightful treat that combines the rich flavors of coffee and creamy texture, velvet coffee ice cream comes to mind. This indulgent dessert offers a luxurious experience, blending smooth ice cream with the bold essence of coffee.
The creamy base typically includes egg yolks, cream, sugar, and, of course, freshly brewed coffee or espresso, creating a velvety consistency that melts in your mouth.
What sets velvet coffee ice cream apart is its perfect balance of sweetness and coffee intensity, making it a fantastic choice for coffee lovers.
It’s not just an ice cream; it’s a celebration of flavor, perfect for a hot day or as a decadent dessert. You’ll savor every spoonful, craving just one more bite.
Rich Espresso Blend
To create that perfect rich espresso blend, you’ll want to focus on a few key elements.
Here are three things to consider that’ll elevate your ice cream experience:
- The intensity of your espresso—stronger means bolder flavor.
- The creaminess of your blend—balance is everything.
- Flavor enhancements like vanilla or chocolate—add a twist to delight your taste buds.
Espresso and Cream Blend
Crafting the perfect espresso and cream blend is essential for achieving that rich, velvety flavor in your coffee ice cream. Start with freshly brewed espresso to ensure boldness.
Then, combine it with heavy cream, which adds that luxurious texture. Here’s how to create your ideal blend:
- Choose Quality: Use high-quality coffee beans for a deeper, more complex flavor.
- Balance the Ratio: Aim for a 1:2 ratio of espresso to cream for the perfect richness without overwhelming bitterness.
- Chill Before Mixing: Allow your espresso to cool before adding cream; this prevents curdling and ensures a smooth blend.
With these steps, you’ll set the foundation for an unforgettable coffee ice cream experience that’ll delight your senses.
Flavor Enhancements Available
After perfecting your espresso and cream blend, you can take your coffee ice cream to the next level with flavor enhancements.
These additions will elevate your dessert from good to unforgettable. Here are three enhancements you shouldn’t miss:
- Cocoa Nibs: Add a delightful crunch and rich chocolate flavor that pairs beautifully with coffee.
- Caramel Swirls: Drizzle in some homemade caramel for a sweet, buttery contrast that’ll dance on your palate.
- Vanilla Bean: Incorporate real vanilla bean for a luxurious depth that complements the espresso perfectly.
With these enhancements, your velvet coffee ice cream will be a symphony of flavors, making every scoop a moment of bliss you won’t want to share!
Enjoy the excitement of crafting your ultimate treat.
Detailed Cooking Instructions
Now that you’ve got your rich espresso blend ready, it’s time to focus on the cooking steps.
Make sure all your ingredients are prepped and at the right stage before mixing.
Once you’ve combined everything, chilling the mixture before churning is key to achieving that velvety texture.
Ingredient Readiness Stage
To ensure your velvet coffee ice cream turns out perfectly, start by gathering all your ingredients in one place. This simple step sets the tone for your delightful creation.
- Fresh coffee beans: Choose a rich, aromatic blend; it’ll elevate your ice cream’s flavor.
- High-quality cream: Opt for heavy cream to achieve that luscious, velvety texture you crave.
- Pure vanilla extract: This adds a warm, comforting note, making every scoop irresistible.
Once you’ve gathered these essentials, you’ll feel excitement bubbling up inside.
It’s the perfect moment to channel your inner ice cream artisan. Trust me, having everything prepped not only streamlines the process but also intensifies your anticipation for that first, creamy bite!
Chill Mixture Before Churning
With your ingredients ready, it’s time to prepare the mixture for churning. Start by pouring your blended mixture into a bowl. Then, cover it tightly with plastic wrap and pop it into the fridge. This chilling step is crucial for achieving that heavenly texture.
Here’s why it matters:
- Enhances Flavor: Chilling allows the flavors to meld beautifully, creating a richer coffee taste.
- Improves Texture: A cold mixture churns better, leading to that velvety ice cream consistency you crave.
- Reduces Ice Crystals: Chilling beforehand helps minimize ice crystals, ensuring your ice cream is smooth and creamy.
After a couple of hours, your mixture will be ready for the churning magic to begin!
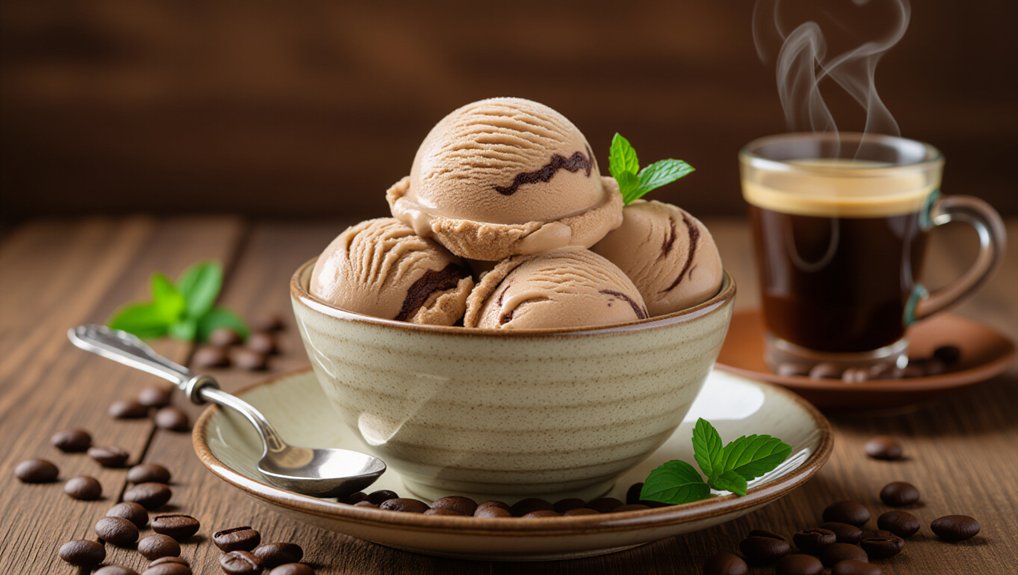
Garnish With Chocolate Shavings
A delightful finishing touch for your velvet coffee ice cream is a sprinkle of chocolate shavings. This simple garnish elevates your dessert, adding both visual appeal and rich flavor.
Here’s how to perfect your presentation:
- Choose Your Chocolate: Use high-quality dark or milk chocolate for a luxurious taste that complements the coffee.
- Shave It Right: With a vegetable peeler or a grater, gently shave the chocolate into delicate curls. This creates an elegant look and enhances the texture.
- Sprinkle Generously: Once you’ve scooped your ice cream, generously sprinkle the shavings on top. The chocolate melts slightly, mingling with the ice cream for a heavenly experience.
Enjoy this simple yet indulgent addition that’ll make your velvet coffee ice cream unforgettable!
Ice Cream Ingredients List
Velvet Coffee Ice Cream
Indulge in a rich and creamy velvet coffee ice cream that’s perfect for satisfying your cravings.
Ingredients
- 2 cups heavy cream
- 1 cup whole milk
- 3/4 cup granulated sugar
- 1 tsp vanilla extract
- 1 cup freshly brewed coffee or espresso
- Pinch of salt
- 3 egg yolks (optional for a custard-style ice cream)
Instructions
- In a saucepan, combine heavy cream, whole milk, and sugar over medium heat. Stir until the sugar dissolves.
- Add vanilla extract, brewed coffee, and a pinch of salt. Stir well to combine.
- If using egg yolks, whisk them in a separate bowl. Gradually temper the yolks by adding a bit of the warm cream mixture, then whisk back into the saucepan.
- Cook the mixture on low heat until it thickens slightly, then remove from heat.
- Cool the mixture completely and then churn it in an ice cream maker according to the manufacturer’s instructions.
- Transfer the churned ice cream to a container and freeze for at least 4 hours before serving.
Chill Bowls for Better Texture
To achieve that creamy, dreamy texture in your velvet coffee ice cream, chilling your bowls is a game changer. Here’s why it matters:
- Prevents ice crystals from forming, keeping your ice cream smooth.
- Enhances flavor by maintaining the right temperature during mixing.
- Makes serving easier, so you can scoop with ease.
Get ready to elevate your ice cream game!
Benefits Of Chilling Bowls
Chilling your bowls before making velvet coffee ice cream can make a noticeable difference in texture.
When you use a cold bowl, it helps maintain the temperature of your ingredients, preventing them from warming up too quickly. This is crucial for achieving that creamy, velvety consistency you desire.
A chilled bowl also allows the ice cream mixture to freeze faster, which reduces the formation of ice crystals. As a result, you get a smoother, more luxurious mouthfeel.
Plus, it makes the mixing process easier, allowing for better incorporation of air and flavors.
Ideal Bowl Materials
Using the right materials for your chilled bowls can further enhance the texture of your velvet coffee ice cream. Opt for stainless steel or glass bowls, as they retain cold temperatures better than plastic.
Stainless steel, in particular, cools quickly and helps keep your ice cream’s creamy consistency. Glass bowls, while slightly slower to chill, offer a sleek look and allow you to monitor the mixture easily.
Avoid using thin or flimsy materials; they won’t hold the chill well, leading to a less-than-ideal texture. If you have the option, consider using bowls designed specifically for freezing.
Investing in quality materials pays off with a smoother, more delightful ice cream experience that you’ll savor with every scoop.
Proper Chilling Techniques
While the right bowls are essential, mastering proper chilling techniques elevates your velvet coffee ice cream to the next level. Start by chilling your mixing bowl in the freezer for at least 30 minutes before you begin. A cold bowl helps maintain the right temperature while mixing, ensuring a smoother texture.
If you use a metal bowl, it conducts cold better, enhancing the chilling effect.
When you’re ready to combine ingredients, work quickly to keep everything cold. If your ice cream mixture starts to warm up, it can lead to ice crystals forming, ruining that velvety texture.
Finally, once you’ve churned the ice cream, transfer it to a pre-chilled container for the final freeze. This keeps your creation luxuriously creamy!
Caloric Breakdown Per Serving
A typical serving of velvet coffee ice cream packs around 250 calories, making it a rich yet indulgent treat. Understanding the caloric breakdown can help you savor each bite without guilt. Here’s a glance at what contributes to those calories:
| Ingredient | Amount (per serving) | Calories |
|---|---|---|
| Coffee | 1/2 cup | 5 |
| Cream | 1/2 cup | 400 |
| Sugar | 1/4 cup | 200 |
| Egg yolks | 2 large | 110 |
You’ll notice that cream and sugar are the primary contributors, so consider adjusting the amounts if you’re looking to lighten your dessert while still enjoying that velvety flavor!
Overmixing the Ice Cream
Understanding the caloric breakdown helps you appreciate your velvet coffee ice cream even more, but the texture is just as important for your enjoyment.
Overmixing can ruin that silky consistency you crave.
Here’s why you should be cautious:
- Air Incorporation: Overmixing adds too much air, leading to a grainy texture instead of creamy bliss.
- Ice Crystals: It can create larger ice crystals, making each scoop less pleasurable to eat.
- Flavor Dilution: Mixing excessively can dilute the rich flavors, leaving you with a bland experience.
To achieve the perfect balance, mix just until everything’s combined.
Your taste buds will thank you for the luscious, velvety delight that’s truly unforgettable!
Add a Sprinkle of Sea Salt
A sprinkle of sea salt can elevate your velvet coffee ice cream to a whole new level.
It perfectly balances the richness of a nutty hazelnut swirl or a luscious caramel drizzle.
Just a touch makes all the difference in flavor, so don’t skip this step!
Nutty Hazelnut Swirl Addition
While you’re crafting your velvet coffee ice cream, adding a nutty hazelnut swirl can elevate the flavor profile to new heights. This delightful addition not only enhances the creaminess but also adds a rich, nutty undertone that’s irresistible.
Here’s how to make it unforgettable:
- Toasted Hazelnuts: Lightly toast your hazelnuts to bring out their natural oils and deepen their flavor.
- Nutty Swirl: Gently fold in the hazelnut paste to create beautiful ribbons of nuttiness throughout the ice cream.
- Sea Salt Sprinkle: Finish with a sprinkle of flaky sea salt to enhance the sweetness and round out the flavors.
This simple swirl transforms your creation into a luxurious dessert that you’ll crave again and again.
Enjoy every creamy, nutty bite!
Caramel Drizzle Option
If you want to take your velvet coffee ice cream to another level, adding a caramel drizzle is a must. This sweet, buttery addition not only elevates the flavors but also creates a luxurious experience.
To really make it special, consider these three tips:
- Choose the Right Caramel: Opt for homemade or high-quality store-bought caramel for that rich taste.
- Warm It Up: Gently heat the caramel so it flows smoothly over the ice cream, creating a beautiful, glossy finish.
- Add a Sprinkle of Sea Salt: A pinch of sea salt enhances the sweetness, providing that perfect balance and taking your dessert from good to unforgettable.
With these simple steps, your velvet coffee ice cream will be irresistibly delicious!
Common Ice Cream Queries
Got questions about ice cream? Whether you’re looking for new flavor ideas, wondering how to store your creations, or need ingredient substitutes, you’re not alone.
Let’s tackle these common ice cream queries to help you perfect your homemade treats.
Ice Cream Flavor Ideas
When it comes to ice cream flavor ideas, the options are nearly endless. You can start with classics like vanilla, chocolate, or strawberry, but don’t be afraid to get creative!
Think about mixing flavors, like caramel swirl with sea salt or coffee with hazelnut. If you love fruit, consider refreshing options like mango, raspberry, or even avocado for a unique twist.
For something more indulgent, try adding cookies, brownies, or even candy pieces into your base. You can also experiment with spices; cinnamon or chai can elevate your ice cream to new heights.
Storage and Shelf Life
After whipping up your favorite ice cream flavors, knowing how to store them properly ensures you can enjoy every scoop at its best.
First, use an airtight container to prevent ice crystals from forming and keep your ice cream creamy. Fill the container, leaving minimal air space to maintain texture and flavor. Store it in the back of your freezer, where the temperature is more stable, rather than in the door.
For optimal freshness, consume your velvet coffee ice cream within two weeks. If you need to store it longer, it can last up to a month, but the quality may decline.
Always let it sit at room temperature for a few minutes before scooping to make serving easier and more enjoyable.
Common Ingredient Substitutes
If you find yourself missing a key ingredient for your velvet coffee ice cream, don’t worry—there are plenty of common substitutes that can work just as well.
If you lack heavy cream, try using coconut cream for a rich, dairy-free option. For the coffee, instant granules can replace brewed coffee in a pinch, giving you that robust flavor.
If you’re short on sugar, maple syrup or honey can add sweetness while enhancing the overall taste. Don’t have vanilla extract? A splash of almond extract can give a delicious twist.
Lastly, if you need a thickener, cornstarch can substitute for egg yolks, ensuring your ice cream stays creamy.
With these swaps, you’ll still achieve that velvet texture and flavor you crave!
Delightful Texture With Sea Salt
To elevate the creamy richness of velvet coffee ice cream, a sprinkle of sea salt creates an irresistible contrast. This small addition enhances the flavor profile, balancing sweetness with a hint of savory.
When you mix in the sea salt, it elevates each bite, letting the coffee notes shine even brighter.
As you churn your ice cream, consider adding the salt gradually. This way, you can taste and adjust until you find the perfect balance for your palate.
The fine crystals dissolve beautifully, ensuring a delightful texture that plays off the smooth creaminess.
Frequently Asked Questions
Can I Use Decaf Coffee for This Recipe?
Yes, you can definitely use decaf coffee for this recipe. It’ll still deliver that rich coffee flavor without the caffeine kick, making it a perfect choice for a delightful treat anytime you want!
How Long Does the Ice Cream Stay Fresh?
Your ice cream stays fresh for about two to three weeks in the freezer. Make sure it’s well-covered to prevent ice crystals from forming and keep that delicious flavor intact for as long as possible!
Can I Substitute Dairy for Non-Dairy Options?
Yes, you can substitute dairy with non-dairy options like almond milk or coconut cream. Just keep in mind that it may alter the flavor and texture slightly, but it’ll still be delicious!
What Equipment Do I Need to Make This Ice Cream?
You’ll need an ice cream maker, mixing bowls, a whisk, a measuring cup, and a spatula. Optional tools like a blender can help smooth your mixture, but they’re not absolutely necessary. Enjoy the process!
How Can I Enhance the Coffee Flavor Further?
You can enhance the coffee flavor by using freshly brewed espresso, adding coffee extract, or incorporating finely ground coffee beans. Experimenting with different roasts can also intensify the richness and depth of your ice cream.
Conclusion
Now that you know how to make Velvet Coffee Ice Cream Bliss, it’s time to dive in! Remember to chill your bowls, avoid overmixing, and add those delightful toppings like sea salt for an extra kick. Enjoy the rich flavors and creamy texture that’ll elevate your dessert game. Whether you’re sharing with friends or indulging solo, this ice cream is sure to impress. So, grab your ingredients and start churning—your taste buds will thank you!