
Making vibrant mini fruit tarts is a rewarding endeavor that combines a flaky crust with creamy filling and fresh fruit. You’ll appreciate the balance of textures and flavors as you layer each element carefully. Understanding the tart crust and the best fruits to use is essential for success. Let’s explore how to achieve that perfect assembly and avoid common pitfalls, ensuring your tarts impress at any gathering.
What Is Tart Crust?
A tart crust is the foundation of any great tart, providing both structure and flavor. You’ll typically use a buttery pastry dough, combining flour, sugar, and cold butter.
The key is to keep everything chilled to achieve that perfect flaky texture. Once you mix your ingredients, roll out the dough and press it into your tart pan. Make sure to trim the edges for a clean look.
Blind-baking is crucial; it prevents a soggy bottom and helps the crust hold its shape. After baking, let it cool completely before filling it.
Fresh Seasonal Fruits
When you think about mini fruit tarts, fresh seasonal fruits are key to creating a vibrant and delicious filling. They not only enhance flavor but also add visual appeal.
Consider these essential components for your tart:
- Juicy berries for a burst of flavor
- Sliced kiwi for a refreshing twist
- Sweet peaches for a touch of summer
- Zesty citrus for a bright finish
Essential Tart Filling Components
Fresh seasonal fruits are the stars of any mini fruit tart, lending vibrant colors and natural sweetness that elevate the dessert. Choosing the right fruits can transform your tarts into stunning masterpieces.
Here’s what to consider when selecting your fruit fillings:
- Berries: Strawberries, blueberries, and raspberries add a burst of flavor and eye-catching hues.
- Citrus: Oranges, lemons, and limes bring a zesty brightness that balances sweetness.
- Stone fruits: Peaches, plums, and cherries offer juicy, succulent textures that melt in your mouth.
- Tropical fruits: Pineapple, mango, and kiwi introduce exotic flavors and vibrant colors.
Flavorful Garnishes and Toppings
To elevate your mini fruit tarts, consider adding flavorful garnishes and toppings that enhance both taste and presentation. Fresh seasonal fruits not only add vibrant colors but also offer a delightful burst of flavor.
Here are some great options to consider:
- Mint leaves: A touch of freshness that complements the sweetness.
- Citrus zest: Adds brightness and a zesty kick.
- Honey drizzle: A natural sweetener that enriches the overall taste.
- Edible flowers: For an elegant and visually stunning finish.
These garnishes won’t only make your mini tarts look stunning but will also tantalize your taste buds.
Get creative and mix different flavors to impress your guests and create a memorable dessert experience!
Detailed Tart Assembly Guide

Now that you’ve chosen your fresh seasonal fruits, it’s time to assemble your mini tarts.
You’ll need to measure your ingredients carefully, bake the tart shells to perfection, and arrange your colorful fruits artfully on top.
Let’s get started on creating these delightful treats!
Ingredient Measurement and Readiness
Gathering the right ingredients is crucial for creating perfect mini fruit tarts. You’ll want to ensure everything’s measured accurately for the best results. Here’s what you need to prepare:
- Shortcrust pastry: Make sure it’s chilled and ready to roll.
- Pastry cream: Have this cooled and thickened before assembly.
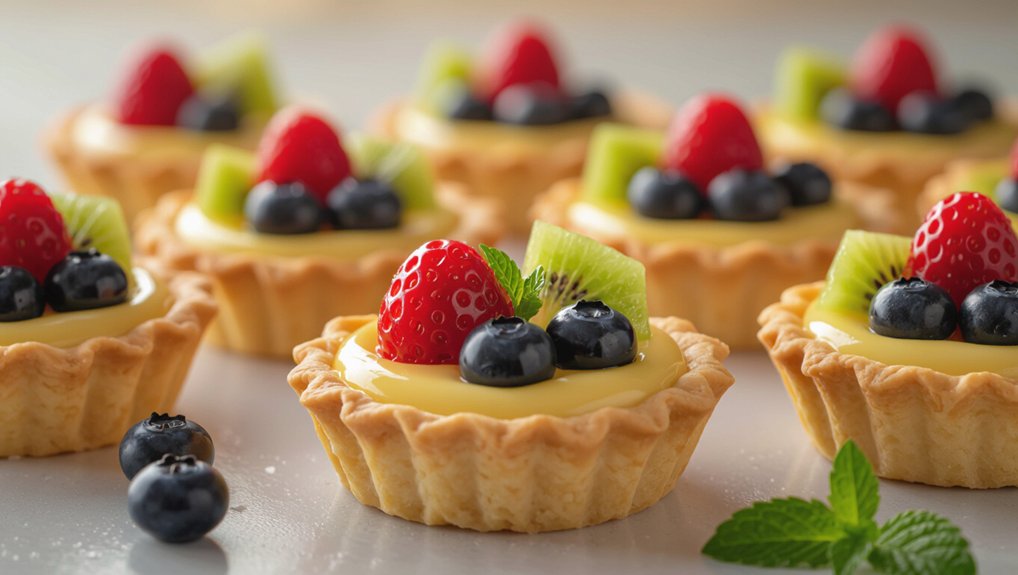
- Fresh fruits: Select a vibrant mix, like strawberries, kiwi, and blueberries.
- Glaze: Prepare a light apricot or lemon glaze to add shine.
Check your pantry for any missing items and get everything prepped. Having these ingredients ready will streamline your assembly process, letting you focus on crafting those delightful tarts.
Trust me, attention to detail in measurement pays off in taste and presentation!
Baking Tart Shells Perfectly
As you dive into baking tart shells perfectly, remember that a well-prepared shortcrust pastry is key to achieving that desired crispness and flavor. Follow these essential tips to enhance your tart shell-making process:
- Chill your ingredients: Cold butter and water help create a flaky texture.
- Don’t overwork the dough: Mix just until combined to keep it tender.
- Prick the base: Use a fork to prevent bubbling during baking.
- Blind bake: Line with parchment and fill with weights to maintain shape.
After baking, let the shells cool completely before filling. This ensures they stay crisp and ready for your vibrant toppings.
Enjoy the delightful process of creating the perfect tart shells!
Colorful Fruit Arrangement
While assembling your mini fruit tarts, the arrangement of colorful fruits can elevate the visual appeal and flavor. Consider these tips to create a stunning display:
- Choose a variety of colors: Combine vibrant berries, citrus slices, and tropical fruits for contrast.
- Layer fruits neatly: Start with a base of larger fruits and add smaller ones on top for texture.
- Vary shapes and sizes: Use whole fruits, slices, and halved pieces to create depth.
- Add a finishing touch: Drizzle a light glaze or sprinkle edible flowers for an elegant finish.
Ingredient List and Instructions
Mini Fruit Tarts
Delightful mini fruit tarts filled with a creamy filling and topped with fresh fruits.
Ingredients
- 1 cup all-purpose flour
- 1/4 cup powdered sugar
- 1/2 cup cold butter
- 1 egg yolk
- 1 splash of vanilla extract
- 1 cup cream cheese
- 1/4 cup sugar
- 1 teaspoon vanilla
- Your favorite fruits (strawberries, blueberries, kiwi)
Instructions
- Preheat your oven to 350°F.
- In a bowl, combine flour and powdered sugar, then cut in the cold butter.
- Add the egg yolk and splash of vanilla, mixing until combined.
- Press the dough into mini tart pans and bake until golden brown.
- In another bowl, mix cream cheese, sugar, and vanilla for the filling.
- Once the tarts are baked and cooled, fill them with the creamy mixture.
- Top with your favorite fruits and enjoy your vibrant creations!
Chill Dough for Easier Handling
Chilling your dough can make a world of difference when you’re crafting mini fruit tarts. It not only enhances the texture but also makes handling much easier.
Here are some key points to consider:
- Benefits of chilling dough
- Ideal chilling duration
- Techniques for easy handling
- Tips for perfect results
Benefits Of Chilling Dough
When you chill dough, you’re not just cooling it down; you’re making it much easier to handle. Chilling firms up the fat, which prevents the dough from becoming too sticky and helps maintain its shape.
This is especially important when you’re working with delicate ingredients like butter. A well-chilled dough rolls out smoothly, allowing you to create even tart shells without tearing.
Plus, it reduces the risk of overworking the dough, which can lead to a tough crust. By taking the time to chill, you also enhance the flavors as the ingredients meld together.
Ideal Chilling Duration
For the best results, aim to chill your dough for at least 30 minutes. This time in the fridge helps the fats solidify, making your dough easier to handle and less likely to shrink when baked.
If you can, chilling it for up to an hour can enhance the texture even more. Just wrap your dough in plastic wrap to keep it fresh and prevent it from drying out.
Remember, a well-chilled dough will roll out smoothly and maintain its shape during baking.
If you’re short on time, even a quick 15-minute chill can provide some benefits, but longer is always better.
Techniques For Easy Handling
To make handling your dough a breeze, simply chill it properly before rolling. After preparing your dough, wrap it tightly in plastic wrap and refrigerate for at least 30 minutes. This step firms up the fat, making it less sticky and easier to work with.
When you’re ready to roll, lightly dust your work surface and rolling pin with flour to prevent sticking. If the dough feels too cold, let it sit for a few minutes at room temperature. Remember, you can always chill the dough again if it starts getting too warm while you’re shaping it.
Proper chilling not only simplifies handling but also enhances the dough’s texture, resulting in perfectly crisp mini tarts.
Caloric Breakdown Per Serving
Understanding the caloric breakdown per serving of mini fruit tarts can help you make informed choices without sacrificing flavor. Each tart is a delightful balance of textures and tastes, but knowing their nutritional content can keep you on track.
Here’s a quick overview of the calories you can expect:
| Ingredient | Calories per Serving | Total Fat (g) |
|---|---|---|
| Tart Shell | 120 | 7 |
| Pastry Cream | 80 | 4 |
| Fresh Fruits | 30 | 0.5 |
| Total (per tart) | 230 | 11.5 |
With this breakdown, you can enjoy your mini fruit tarts while keeping your dietary goals in mind. Savor each bite and feel good about your choices!
Overbaking the Tart Shells
While baking mini fruit tarts, overbaking the tart shells can turn a delightful treat into a crunchy disappointment. To ensure your shells are perfectly baked, keep these tips in mind:
- Watch the time closely: Set a timer to avoid losing track.
- Check for color: Look for a light golden hue, not dark brown.
- Use the right temperature: Too high can lead to quick overbaking.
- Cool properly: Let them cool in the pan for a few minutes before transferring to a rack.
Mini Tart Flavor Swaps
When you’re ready to mix things up, consider adding citrus zest to your mini tarts for a burst of brightness.
You can also experiment with herb-infused cream fillings to elevate the flavor profile.
These simple swaps can transform your tarts into a delightful twist everyone will love!
Citrus Zest for Added Brightness
Adding citrus zest to your mini fruit tarts instantly brightens their flavor profile. Just a sprinkle can elevate your tart from ordinary to extraordinary.
Here’s how you can incorporate citrus zest into your creations:
- Lemon Zest: Adds a refreshing zing, perfect for balancing sweetness.
- Lime Zest: Offers a tangy twist that pairs wonderfully with tropical fruits.
- Orange Zest: Brings a sweet and fragrant aroma, enhancing berry flavors.
- Grapefruit Zest: Introduces a unique bitterness that contrasts beautifully with creamy fillings.
Experimenting with these zests not only enhances the taste but also adds a vibrant visual appeal.
Don’t hesitate to mix and match to discover your favorite combinations, making every bite a delightful experience!
Herb-Infused Cream Filling
To elevate your mini fruit tarts, consider infusing the cream filling with fresh herbs, transforming the traditional into something extraordinary. Herb-infused cream adds a unique flavor profile that pairs beautifully with fruits.
Here are some ideas to get you started:
- Basil: Its sweet, peppery notes complement strawberries or peaches perfectly.
- Mint: A refreshing touch that works wonders with berries or melons.
- Lavender: Provides a floral hint, ideal for pairing with citrus fruits.
- Thyme: Adds a savory depth that enhances stone fruits like apricots.
Simply steep the herbs in your cream before whipping it for a delightful twist.
Your mini tarts won’t only look vibrant but taste amazing, impressing everyone at your next gathering!
Common Tart-Making Inquiries
When making mini fruit tarts, you might wonder about the best crust to use or which fruits pair well together.
Figuring out the perfect filling can also be a challenge.
Let’s tackle these common inquiries to ensure your tarts turn out delicious every time.
Choosing The Right Crust
Choosing the right crust can make or break your mini fruit tarts, as it sets the foundation for flavor and texture. You’ve got a few options here. A classic buttery tart shell adds richness, while a cookie crust offers a sweet crunch.
If you’re aiming for a gluten-free version, consider using almond flour or a nut-based crust.
Make sure your crust is baked until golden to avoid sogginess. Par-baking is a technique that helps achieve a crisp base, especially if you’re adding a custard filling.
Ideal Fruit Combinations
While crafting mini fruit tarts, the right mix of fruits can elevate your dessert from good to unforgettable. Think about combining sweet and tart flavors for balance.
Strawberries and kiwis create a vibrant contrast, while blueberries add a juicy burst. If you’re feeling adventurous, mix tropical fruits like mango and pineapple for a refreshing twist.
Consider texture, too; the crunch of apples pairs nicely with the softness of peaches.
Don’t forget seasonal fruits! In summer, peaches and raspberries shine, while winter calls for citrus like blood oranges and pomegranates.
Aim for a colorful presentation—your tarts will look as good as they taste. With these combinations, you’ll create a delightful experience that’ll impress everyone at your gathering!
Perfecting The Filling
To achieve the perfect filling for your mini fruit tarts, focus on balancing flavors and textures that complement your chosen fruits.
Start with a classic pastry cream or a light whipped mascarpone, both of which provide a rich yet creamy base. You can add a hint of vanilla or citrus zest to enhance the flavor.
If you prefer something lighter, consider a yogurt-based filling for a tangy twist.
Don’t forget about sweetness; adjust sugar levels based on your fruit’s natural sweetness.
For a glossy finish, brush your filled tarts with a fruit glaze or apricot preserves. This not only looks stunning but also adds a layer of flavor.
Experiment with different fillings to find your perfect combination!
Serve With a Dollop of Cream
Nothing elevates mini fruit tarts quite like a dollop of cream. When you add that creamy touch, you create a delightful contrast to the crisp crust and vibrant fruit.
Whipped cream is the classic choice, but you can get creative! Try flavored creams, like vanilla or citrus, to enhance your tarts further.
To achieve the perfect texture, whip your cream until soft peaks form—this ensures it holds its shape while remaining light. You can sweeten it slightly with powdered sugar, adding just a hint of sweetness.
As you serve, don’t be shy—generously top each tart with cream, allowing it to cascade over the edges. Your guests will appreciate the extra indulgence, making each bite even more memorable.
Enjoy!
Frequently Asked Questions
Can I Use Frozen Fruit Instead of Fresh?
Yes, you can use frozen fruit instead of fresh. Just make sure to thaw and drain excess moisture. This way, your mini tarts will still look vibrant and taste delicious without compromising texture or flavor.
How Do I Prevent Soggy Tart Shells?
To prevent soggy tart shells, bake them blind using parchment and weights. Let them cool completely before adding filling. You can also brush the shells with melted chocolate or egg wash for extra protection.
What Tools Do I Need for Making Mini Tarts?
You’ll need a tart pan, a rolling pin, a sharp knife, and a pastry brush. Don’t forget mixing bowls, measuring cups, and a baking sheet. These tools will help you create delicious mini tarts effortlessly!
Can I Make the Crust Ahead of Time?
Yes, you can make the crust ahead of time! Just prepare it, bake, and let it cool completely. Store it in an airtight container in the fridge for up to a few days. Enjoy!
How Long Do the Tarts Last in the Fridge?
The tarts last about two to three days in the fridge. To keep them fresh, cover them tightly. Enjoy them quickly for the best flavor and texture, as the fruit may start to wilt.
Conclusion
Making vibrant mini fruit tarts is a delightful way to showcase seasonal fruits. By following the steps for a buttery tart crust and creamy filling, you’ll create a stunning dessert that’s sure to impress. Don’t forget to experiment with flavors and toppings to make each tart your own. Whether for a special occasion or just because, these tarts are a perfect sweet treat that everyone will love. Enjoy every colorful bite!