
If you’re looking to host a fun and interactive gathering, a Mini Pizza Party Box is a great idea. You’ll want to gather all the essential ingredients, from bases to toppings, ensuring everyone can create their perfect pie. The assembly is straightforward, but the possibilities are endless. So, how do you pull it all together for an enjoyable experience? Let’s explore the details that will make your pizza party a hit.
Mini Pizza Party Overview
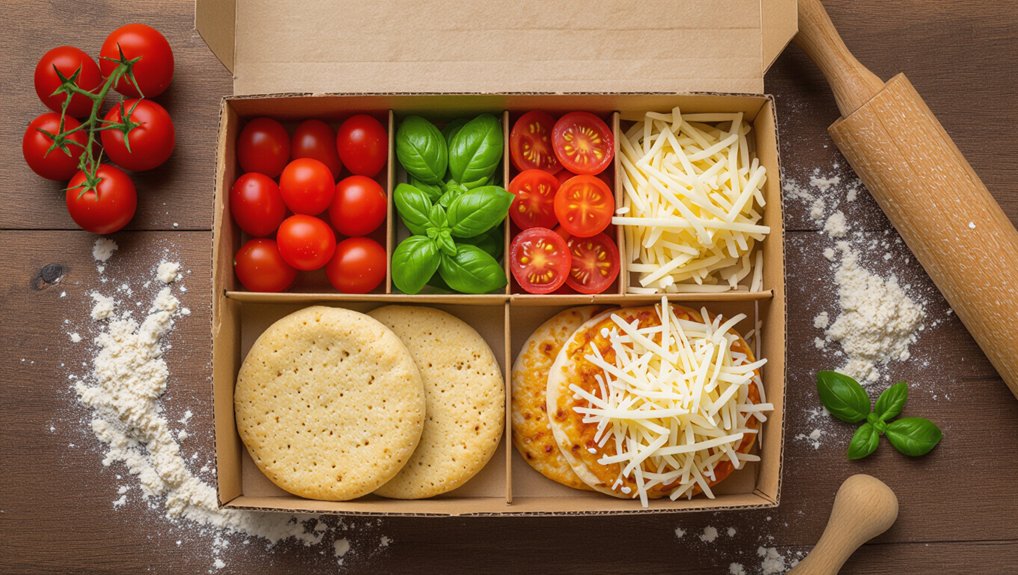
A mini pizza party can be a fun and interactive way to bring friends and family together. You can set up a cozy space with all the essentials for a memorable experience.
Think about having a variety of mini pizza bases ready, along with an array of toppings that cater to everyone’s tastes. This gives your guests the freedom to create their own unique pizzas, sparking creativity and conversation.
You’ll enjoy watching them mix and match ingredients, and everyone’s bound to come up with a delicious combination. Plus, it’s a great way to bond, as you all share the excitement of cooking together.
Essential Pizza Dough Components
To create the perfect mini pizza, you need to focus on essential dough components.
Here’s what you should include for a solid base:
- Flour
- Water
- Yeast
Once you’ve got those down, the fun toppings like pepperoni or olives can really make your mini pizzas shine!
Essential Dough Components
Crafting the perfect mini pizza starts with understanding the essential dough components. The right ingredients set the foundation for a delicious crust. Here’s what you’ll need:
- Flour: Use high-quality all-purpose or bread flour for that perfect texture. It gives your dough structure and chewiness.
- Water: The right amount of warm water activates the yeast. It helps bind the ingredients and makes the dough pliable.
- Yeast: Active dry yeast or instant yeast will give your dough its rise. It’s essential for creating that airy, fluffy crust.
Combine these ingredients thoughtfully, and you’ll be well on your way to mini pizza perfection!
With the right dough, you’ll create a base that perfectly supports your favorite toppings.
Toppings Like Pepperoni or Olives
Toppings can make or break your mini pizza experience, so choose wisely! The right toppings elevate your flavors and keep everyone coming back for more.
Here are three classic options you can’t go wrong with:
- Pepperoni: This timeless favorite adds a spicy kick and pairs perfectly with gooey cheese.
- Olives: Whether you like black or green, olives provide a salty, briny contrast that enhances the overall taste.
- Vegetables: Consider bell peppers, onions, or mushrooms for a fresh crunch that balances out the richness of cheese and meats.
Mix and match these toppings to create mini pizzas that cater to every palate.
Enjoy the process, and let your creativity shine!
Detailed Cooking Instructions
Now that you’ve got your dough ready, it’s crucial to let it rest for the right amount of time for the best texture.
Once it’s time to bake, crank your oven to 450°F (232°C) for that perfect crispy crust.
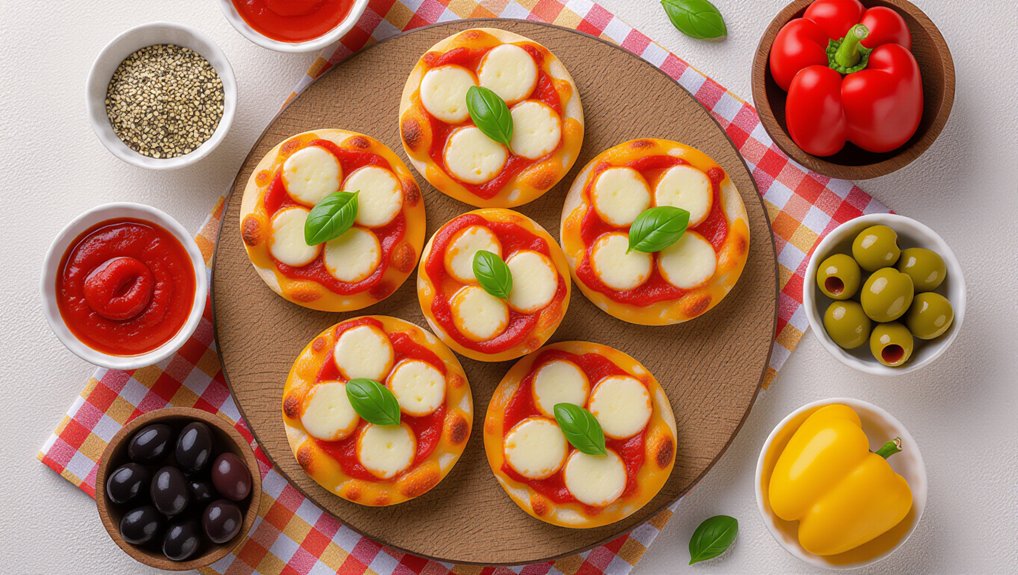
Don’t forget to garnish your mini pizzas with fresh basil right before serving for an extra burst of flavor!
Dough Resting Time Needed
To ensure your mini pizza dough turns out perfectly, you need to give it adequate resting time. This not only helps develop flavor but also improves the dough’s texture. Follow these steps for optimal results:
- Initial Rest: After mixing the dough, let it rest for about 30 minutes. This allows the gluten to relax, making it easier to shape.
- Second Rest: After shaping your mini pizzas, cover them with a towel and let them rest for another 15-20 minutes. This step helps the dough rise slightly, creating a lighter crust.
- Final Check: If the dough feels too sticky, a quick sprinkle of flour can help.
Now, you’re ready to load up your mini pizzas with toppings!
Baking at 450°F (232°C)
Once your mini pizza dough has rested and is ready for action, it’s time to preheat your oven to 450°F (232°C). This high temperature ensures that your mini pizzas bake quickly and get that perfect crispy crust.
Follow these steps for baking:
- Prepare Your Baking Sheet: Lightly oil or line it with parchment paper to prevent sticking.
- Shape and Assemble: Roll out your dough into mini circles, place them on the baking sheet, and add your favorite toppings.
- Bake: Slide the tray into the oven and bake for about 10-12 minutes, or until the edges are golden brown and the cheese is bubbly.
Keep an eye on them to avoid overbaking, and enjoy your mini pizza creations!
Garnish With Fresh Basil
As you pull your mini pizzas from the oven, think about adding a burst of freshness with some fragrant basil. This simple touch elevates your mini pizzas, making them even more delightful.
Here’s how to garnish:
- Choose Fresh Basil: Pick vibrant, green leaves. Avoid any wilted or brown spots for the best flavor.
- Tear, Don’t Cut: Tear the basil leaves by hand to release their essential oils. This enhances the aroma and taste.
- Add Just Before Serving: Place the torn basil on your pizzas right before serving. This way, they stay fresh and aromatic!
Your mini pizzas won’t only look stunning but will also have that fresh, herbaceous kick that everyone loves. Enjoy your delicious creation!
Mini Pizza Ingredients List
Mini Pizza Recipe
Creating the perfect mini pizzas starts with a well-thought-out ingredients list. Whether you make the dough from scratch or buy pre-made, you’ll be on your way to a tasty mini pizza party!
Ingredients
- Pizza dough (homemade or pre-made)
- Pizza sauce (tomato, pesto, or BBQ)
- Mozzarella cheese
- Cheddar or feta cheese (optional)
- Toppings: pepperoni, bell peppers, onions, olives, mushrooms
- Fresh herbs: basil or oregano
- Extras: pineapple or jalapeños
Instructions
- Preheat your oven to 450°F (230°C).
- Roll out the pizza dough into small rounds.
- Spread your chosen sauce evenly on each dough round.
- Sprinkle mozzarella and any additional cheeses on top.
- Add your favorite toppings and herbs.
- Bake in the oven for 8-10 minutes or until the crust is golden.
- Remove from the oven and let cool slightly before serving.
Use Parchment Paper for Baking
Using parchment paper for baking mini pizzas can make your life easier and your pizzas better.
Here are some key points to consider:
- Benefits of Parchment Paper
- Proper Usage Tips
- Cleanup Made Easy
Let’s explore how this simple tool can enhance your pizza-making experience!
Benefits Of Parchment Paper
When it comes to baking, parchment paper is your best friend. It makes your life easier by preventing sticking, so you won’t lose half your mini pizzas to the pan.
Plus, it absorbs moisture, helping you achieve that perfect crispy crust. You’ll also find that cleanup is a breeze; just toss the used paper and you’re done!
Another great benefit is that parchment paper can withstand high temperatures, making it ideal for baking in the oven.
It’s also versatile, working well for both savory and sweet dishes. If you’re looking to elevate your mini pizza party, using parchment paper is a simple yet effective way to enhance your baking experience.
You’ll love the results!
Proper Usage Tips
Although you might think parchment paper is just an optional tool, it can significantly improve your baking experience. Using it for your mini pizza party box makes a world of difference.
First, line your baking sheets with parchment to prevent sticking. This way, your mini pizzas slide right off when they’re done. Make sure to cut the parchment to fit your pans, ensuring full coverage.
When preheating the oven, place the parchment on a cool surface to avoid warping. If you’re using multiple sheets, keep them stacked for easy handling.
Cleanup Made Easy
Cleanup becomes a breeze with parchment paper, making your mini pizza party a lot more enjoyable. By lining your baking sheets with parchment, you’ll prevent sticking and eliminate the need for scrubbing.
Once your pizzas are done baking, simply lift the parchment and toss it in the trash. You won’t have to worry about baked-on cheese or sauce ruining your pans.
Plus, it helps keep your pizzas intact when you transfer them. If you’re feeling extra festive, consider using colored parchment for a fun touch.
Caloric Content per Serving
Understanding the caloric content per serving of your mini pizza party box is essential for enjoying your meal without going overboard. Each mini pizza can vary in calories depending on the ingredients you choose. Here’s a quick breakdown:
| Ingredient | Calories per Serving |
|---|---|
| Dough (1 mini) | 150 |
| Sauce (2 tbsp) | 30 |
| Cheese (1 oz) | 100 |
Overloading With Toppings
When it comes to mini pizza parties, less can often be more—especially with toppings. Overloading your mini pizzas might seem tempting, but it can lead to soggy crusts and overwhelming flavors.
Instead, focus on a balanced approach. Here are three topping strategies to elevate your mini pizzas:
- Choose a Base: Start with a solid foundation, like classic marinara or a rich pesto, to set the stage for your toppings.
- Limit Your Options: Stick to two or three complementary toppings. For example, pair pepperoni with mozzarella and fresh basil for a classic vibe.
- Add Fresh Elements: Consider finishing with a sprinkle of arugula or a drizzle of balsamic glaze post-baking for a fresh kick.
Keep it simple, and your mini pizza party will shine!
Creative Dipping Sauces
When it comes to dipping sauces, think outside the box!
You can whip up unique cheese blends to complement your mini pizzas or add a spicy sriracha drizzle for a kick.
These creative options will elevate your pizza party and keep everyone coming back for more!
Unique Cheese Blends
While you’re preparing your mini pizza party box, consider elevating the experience with unique cheese blends that will tantalize your taste buds.
Mixing different cheeses can create delightful flavors that pair perfectly with your pizzas and dipping sauces. Here are three cheese blends to try:
- Mozzarella and Gouda: Combines the stretchiness of mozzarella with the rich, smoky taste of Gouda.
- Parmesan and Fontina: Offers a sharp, nutty flavor from Parmesan balanced by Fontina’s creamy texture.
- Cheddar and Cream Cheese: Delivers a tangy kick from cheddar, softened by the smoothness of cream cheese.
Experimenting with these blends won’t only enhance the taste of your mini pizzas but also impress your guests!
Spicy Sriracha Drizzle
Elevating your mini pizza party doesn’t stop at unique cheese blends; adding a spicy Sriracha drizzle can take your flavor game to the next level.
This zesty sauce not only enhances the taste but also adds a fun kick that your guests will love. Here’s how to make it even more interesting:
- Mix it Up: Combine Sriracha with mayo for a creamy, spicy dip.
- Citrus Twist: Add a splash of lime juice to brighten the flavor.
- Honey Sweetness: Blend in a bit of honey to balance the heat.
Drizzle this blend over your mini pizzas or serve it on the side for dipping.
Your guests will thank you for this fiery addition!
Common Pizza Party Queries
When planning your mini pizza party, you might wonder about the best toppings to satisfy everyone’s taste.
You’ll also want to ensure you have the essential supplies and some fun serving ideas to keep things lively.
Let’s tackle these common queries so you can throw a fantastic event!
Ideal Pizza Toppings Choices
Choosing the right toppings can make or break your mini pizza party, so it’s essential to consider everyone’s preferences. Start with classic options like pepperoni and mozzarella, which are always crowd-pleasers.
Don’t forget about veggie lovers; toppings like bell peppers, mushrooms, and olives can add color and flavor.
If you want to get adventurous, try unique choices like barbecue chicken or pesto instead of traditional tomato sauce.
For the cheese enthusiasts, consider adding goat cheese or feta for a twist.
Finally, keep dietary restrictions in mind; offering gluten-free crusts and dairy-free cheese ensures everyone can enjoy the fun.
With a variety of toppings, you’ll create a mini pizza experience that satisfies every guest!
Essential Party Supplies Needed
To ensure your mini pizza party is a hit, gathering the right supplies is crucial. Start with mini pizza boxes or paper plates for easy serving.
You’ll need pizza dough, sauce, cheese, and your favorite toppings—don’t forget the essentials like olive oil and spices for added flavor. A cutting board and a pizza cutter will make slicing a breeze, while disposable napkins and utensils keep cleanup simple.
For drinks, consider mini bottles or cans to complement the pizzas. If you want to add some fun, grab colorful decorations or themed tableware.
Finally, a good playlist will set the mood, making your party unforgettable. With these essentials, you’re well on your way to hosting a fantastic mini pizza bash!
Fun Serving Ideas
How can you make serving mini pizzas even more fun? Try setting up a build-your-own pizza station!
Lay out a variety of toppings like pepperoni, veggies, and different cheeses. Let your guests customize their mini pizzas to suit their tastes.
You could also create themed pizza boxes, like a “Taco Pizza” or “Breakfast Pizza” box, to surprise everyone.
For a playful twist, use colorful paper plates or mini pizza cutters as party favors.
Don’t forget to include fun dipping sauces like ranch or garlic butter!
Lastly, consider a pizza contest where guests vote for the best mini pizza. This adds a competitive edge and gets everyone involved.
Enjoy the creativity and deliciousness!
Enjoy With Friends!
Gather a few friends, and you’re set for a fun mini pizza party! The best part about this gathering is that everyone can get involved.
Set up a toppings station with a variety of options—pepperoni, veggies, and different cheeses. Let your friends customize their pizzas, making it a creative experience.
While the pizzas bake, share stories, play some music, or even have a mini pizza-themed trivia game to keep the energy up.
Once they’re ready, grab your mini pizzas, gather around, and enjoy. Don’t forget to take some fun photos to capture the moment!
This isn’t just about the food; it’s about the laughter and memories you create together. So dig in and enjoy each delicious bite!
Frequently Asked Questions
Can I Make the Dough Ahead of Time?
Yes, you can make the dough ahead of time! Just prepare it, let it rise, and store it in the fridge. When you’re ready, take it out, let it rest, then shape and bake.
What Are Alternative Toppings for Dietary Restrictions?
You can use dairy-free cheese, gluten-free crusts, or veggie toppings like mushrooms, bell peppers, and spinach. For protein, consider chickpeas or turkey pepperoni. Experimenting with flavors keeps everyone happy and satisfied at your gathering!
How Do I Store Leftover Mini Pizzas?
Store leftover mini pizzas in an airtight container in the fridge. They’ll stay fresh for up to three days. To reheat, pop them in the oven or microwave until warmed through and crispy again. Enjoy!
Can I Freeze Mini Pizzas for Later?
Yes, you can freeze mini pizzas for later. Just wrap them tightly in plastic wrap or foil, then place them in an airtight container. When you’re ready, bake them straight from the freezer. Enjoy!
What Beverages Pair Well With Mini Pizzas?
You can’t go wrong with classic soda, sparkling water, or fruit juices. If you’re feeling adventurous, try pairing mini pizzas with craft beers or a light wine for a fun twist. Enjoy your party!
Conclusion
Now that you’ve got everything ready for your Mini Pizza Party Box, it’s time to gather your friends and unleash your creativity! With all the toppings and sauces at your fingertips, you can mix and match to create the perfect mini pizzas. Don’t forget to enjoy the process, share some laughs, and savor each delicious bite. So, fire up those ovens, and let the pizza-making fun begin! Happy cooking!