
When you want to master the art of melted kunafa perfection, understanding the dough is key. Kunafa isn’t just any pastry; it’s a delicate blend of textures and flavors. You’ll need to pay attention to each step, from the butter to the baking time. Mistakes can easily lead to dryness or uneven cooking. Curious about the essential components and detailed techniques that can elevate your kunafa? Let’s explore further.
What Is Kunafa Dough?
Kunafa dough is a unique pastry that adds a delightful texture to various desserts. When you handle it, you’ll notice its thin, thread-like strands that create a light, crispy layer.
This dough is made from semolina or fine flour, which gives it that signature chewiness. You’ll often find it used in Middle Eastern sweets, where it’s layered with fillings like cheese or nuts.
The best part? It absorbs flavors beautifully, enhancing whatever dish you create. Whether you’re crafting a classic kunafa or experimenting with new recipes, mastering this dough is essential.
With it, you’re on your way to making indulgent treats that impress both friends and family. So, roll up your sleeves and dive into the world of kunafa!
Essential Flavor Components
When you’re making melted kunafa, the right flavor components make all the difference.
Focus on these essentials to elevate your dish:
- Sweet syrup for drenching
- Rich cheese for creaminess
- Crunchy nuts for texture
- Dried fruits for a hint of sweetness
These ingredients will bring your kunafa to life!
Key Kunafa Components
The magic of melted kunafa lies in its essential flavor components, which create a delightful balance of sweetness and richness.
To achieve this perfect harmony, you’ll want to focus on these key ingredients:
- Kunafa Dough: Thin strands of dough provide a crispy texture that contrasts beautifully with the creamy filling.
- Cheese Filling: A mix of sweet, stretchy cheese like mozzarella adds richness and a savory touch.
- Sugar Syrup: This sweet, aromatic syrup drizzled on top enhances the overall sweetness and moisture.
- Butter: Melted butter not only adds richness but also helps achieve that golden, crispy outer layer.
Nuts and Dried Fruits
Adding nuts and dried fruits elevates melted kunafa, introducing layers of flavor and texture.
These ingredients not only enhance the dish but also provide a delightful crunch and natural sweetness. Here are some fantastic options to consider:
- Pistachios: Their vibrant green color and rich taste add a nutty depth.
- Walnuts: They offer a slightly bitter note that balances the sweetness of kunafa.
- Almonds: Sliced or slivered, they contribute a satisfying crunch and mild flavor.
- Raisins or Dates: These dried fruits infuse a natural sweetness, complementing the richness of the cheese.
Incorporating these elements will create a more complex and indulgent kunafa, making each bite a delightful experience.
Detailed Cooking Instructions

Now that you’ve got the flavor components down, let’s focus on the cooking process.
Start by shredding the kunafa dough evenly to ensure a perfect texture.
Then, bake it until it’s golden brown and finish off with a sprinkle of crushed pistachios for that final touch.
Shredding Kunafa Dough Evenly
Shredding kunafa dough evenly is crucial for achieving that perfect texture and crispiness in your dessert. Here’s how to do it effectively:
- Choose the Right Tools: Use a sharp knife or kitchen scissors for clean cuts.
- Cut into Strips: Begin by cutting the dough into long strips, about 1-inch wide. This ensures uniformity.
- Shred into Smaller Pieces: Take each strip and shred it into smaller, even pieces. Aim for a size that’ll allow for even cooking.
- Loosely Fluff the Shredded Dough: Once shredded, gently fluff the dough with your fingers. This promotes air circulation and prevents clumping.
Follow these steps, and you’ll set the stage for a delightful kunafa that’s crispy on the outside and indulgently gooey inside!
Baking Until Golden Brown
Once you’ve shredded the kunafa dough evenly, it’s time to bake it to perfection. Follow these steps to achieve that golden brown finish:
- Preheat your oven to 350°F (175°C) for even cooking.
- Spread the dough evenly in a greased baking dish, ensuring no gaps for consistent baking.
- Bake for 25-30 minutes, checking halfway through. Rotate the dish if necessary for uniform browning.
- Keep an eye on it during the last few minutes; once it turns golden brown, remove it from the oven to prevent burning.
Let the kunafa cool slightly before serving.
You’ll love that beautiful crunch combined with a soft, gooey center! Enjoy the aroma wafting through your kitchen.
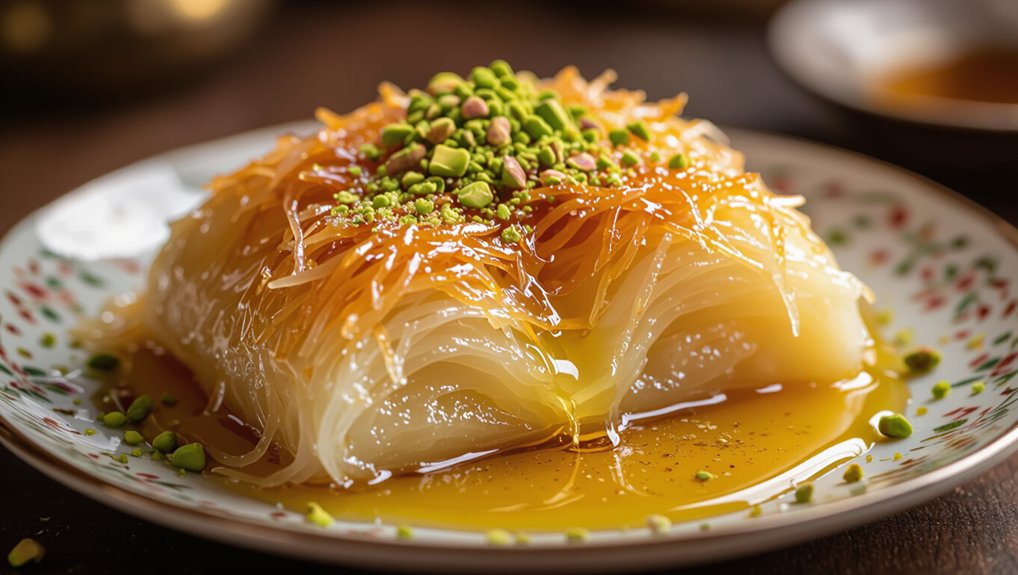
Garnish With Crushed Pistachios
To elevate your melted kunafa, a generous sprinkle of crushed pistachios adds not only a burst of color but also a delightful crunch. Here’s how to perfectly garnish your dessert:
- Prepare the Pistachios: Use unsalted pistachios for the best flavor. Shell and finely chop them with a knife or food processor.
- Timing is Key: Wait until your kunafa has cooled slightly before adding the pistachios. This ensures they stay crunchy.
- Even Distribution: Sprinkle the crushed pistachios evenly over the kunafa, covering every inch for maximum flavor.
- Optional Sweet Drizzle: For an extra touch, drizzle some honey or syrup over the pistachios to enhance their sweetness.
Enjoy the delightful contrast that this garnish brings to your kunafa!
Ingredient Measurements
Melted Kunafa Recipe
Experience the perfect balance of flavors and textures with this delicious melted kunafa, featuring a creamy cheese filling and a sweet syrup.
Ingredients
- 500 grams of kunafa dough
- 250 grams of unsalted cheese (or a mix of ricotta and mozzarella)
- 100 grams of sugar
- 200 ml of milk
- 100 grams of unsalted butter (melted)
- 200 grams of sugar (for syrup)
- 200 ml of water (for syrup)
- A splash of rose or orange blossom water (for aroma)
Instructions
- Preheat your oven to 180°C (350°F).
- Spread the kunafa dough evenly in a baking dish.
- Mix the cheese, sugar, milk, and melted butter in a bowl to prepare the filling.
- Spread the cheese mixture over the kunafa dough.
- Cover with another layer of kunafa dough and bake for 30-35 minutes until golden brown.
- While baking, prepare the syrup by boiling sugar and water together, adding the floral water last.
- Once the kunafa is baked, pour the syrup over it and let it soak for a few minutes before serving.
Use Clarified Butter Generously
When making melted kunafa, using clarified butter is key to achieving that rich flavor and perfect texture.
Here are some important points to consider:
- Clarified butter enhances the taste.
- It prevents the kunafa from becoming soggy.
- Preparing it’s simple and quick.
- Apply it generously for best results.
Get ready to elevate your kunafa game!
Importance Of Clarified Butter
Using clarified butter generously is crucial for achieving that perfect melt-in-your-mouth texture in kunafa. This golden liquid not only enhances flavor but also provides the necessary moisture to keep the pastry soft and tender.
Unlike regular butter, clarified butter has a higher smoke point, which means it won’t burn easily during cooking. This allows your kunafa to develop that beautiful golden color without the risk of bitterness.
Plus, the absence of milk solids means you’ll avoid unwanted browning, ensuring a rich, buttery taste. When you use it generously, you coat every strand of dough, allowing it to crisp up beautifully while retaining its luscious interior.
Ultimately, clarified butter is your secret weapon for the ideal kunafa experience.
How To Prepare It
Clarified butter plays a pivotal role in preparing kunafa, so it’s time to put it to good use. Start by melting a generous amount in a saucepan over low heat. You’ll want enough to coat the strands of kunafa thoroughly.
While the butter’s melting, take your kunafa and break it into smaller pieces for easier handling. Once the butter’s ready, pour it over the kunafa and mix it well, ensuring every piece is evenly coated. This step is crucial; it helps achieve that deliciously crispy texture.
Let it sit for a few minutes, allowing the butter to soak in. The buttery goodness will elevate your kunafa, setting the stage for a truly indulgent treat. Get ready to impress!
Application Tips For Success
To achieve the perfect texture for your kunafa, don’t skimp on the clarified butter. Generously drizzle it over the shredded phyllo dough, ensuring every strand is coated. This not only adds flavor but also creates that sought-after crispy, golden exterior.
When layering your kunafa, use a brush to evenly spread the butter; it’ll help achieve an even bake.
If you’re working with a large batch, consider melting extra butter to keep the consistency smooth. Remember, the butter should be warm but not sizzling—this will help the dough absorb it better.
Finally, don’t forget to add a little extra on top before it goes into the oven. This’ll give your kunafa a beautifully rich finish. Enjoy!
Caloric Breakdown Per Serving
While indulging in melted kunafa, it’s essential to be aware of its caloric content. Each serving delivers a rich blend of flavors, but it comes with a calorie load that you should consider. Here’s a quick breakdown to help you balance your treats wisely.
| Component | Amount (per serving) | Calories |
|---|---|---|
| Kunafa Noodles | 100g | 350 |
| Butter | 30g | 215 |
| Sugar Syrup | 50g | 150 |
| Cheese Filling | 50g | 200 |
| Total | 915 |
Understanding these numbers lets you enjoy kunafa while staying mindful of your dietary choices.
Overbaking for Dryness
Overbaking kunafa can lead to dryness that ruins its intended texture and flavor. To ensure your kunafa remains perfectly indulgent, keep these tips in mind:
- Monitor Baking Time: Check it a few minutes before the suggested time to prevent overbaking.
- Use the Right Temperature: Stick to the recommended oven temperature; too high can dry it out quickly.
- Watch for Color: Look for a golden-brown hue, not dark brown, indicating it’s done but not overbaked.
- Test Texture: Gently press the edges—if it feels hard, it’s likely overbaked.
Fruit-Infused Syrup Drizzle
To elevate your melted kunafa, try adding a fruit-infused syrup drizzle.
A swirl of chocolate hazelnut spread or a zingy lemon zest infusion can really enhance the flavors.
These simple additions transform your dessert into a delightful experience.
Chocolate Hazelnut Spread Swirl
A swirl of chocolate hazelnut spread elevates melted kunafa to a whole new level of indulgence. This luscious addition perfectly complements the crispy texture and sweet syrup, creating a delightful contrast.
To achieve this dreamy fusion, follow these steps:
- Choose Quality Spread: Opt for a rich, creamy chocolate hazelnut spread to maximize flavor.
- Warm It Up: Gently heat the spread until it’s easy to swirl; this enhances its smoothness.
- Drizzle Generously: Use a spoon to create beautiful swirls on top of your kunafa, letting some mix into the layers.
- Garnish: Finish off with crushed hazelnuts for added crunch and a touch of elegance.
Enjoy this decadent twist on a classic dessert!
Lemon Zest Infusion
How can you elevate your melted kunafa with a refreshing twist? A lemon zest infusion is your answer! This vibrant syrup adds a burst of citrus that complements the rich flavors beautifully.
Here’s how to make it:
- Zest the Lemon: Use a microplane to finely grate the outer peel, releasing fragrant oils.
- Juice It: Squeeze fresh lemon juice to enhance the syrup’s tanginess.
- Combine Ingredients: In a saucepan, mix equal parts sugar and water, then add the zest and juice.
- Simmer: Heat until the sugar dissolves and the mixture thickens slightly.
Drizzle this syrup over your kunafa for a delightful contrast that’ll make every bite unforgettable!
Common Kunafa Mistakes
When making kunafa, it’s easy to make a few common mistakes that can ruin your dish. You might overcook the dough, skip the soaking step, or use the wrong cheese ratio without even realizing it.
Let’s explore these pitfalls so you can perfect your kunafa every time.
Overcooking The Dough
Overcooking the dough can ruin your kunafa, leaving it dry and tough instead of the desired crispy and tender texture. To avoid this mistake, keep a close eye on your cooking time.
When you bake or fry the kunafa, aim for a golden-brown color. If you let it cook too long, it’ll lose its delicate nature and become chewy.
Remember, the goal is to achieve that perfect balance of crunchiness on the outside while keeping the inside moist. If you’re unsure, test a small piece as it cooks.
If it feels too firm or looks overly dark, it’s time to take it off the heat. Your patience and attention will pay off with a deliciously satisfying dessert!
Skipping The Soaking Step
Achieving the right texture in kunafa doesn’t stop at cooking time; soaking the dough is just as important. If you skip this step, you risk ending up with a dry, crumbly dessert rather than the delicious, gooey treat you aim for.
Soaking allows the dough to absorb syrup, creating that melt-in-your-mouth experience everyone loves. Make sure to let it soak long enough—about 30 minutes should do the trick. This gives the kunafa a perfect balance of sweetness and moisture.
Don’t rush it! Dive into the soaking process, and you’ll notice a significant improvement in both flavor and texture. Trust me, your kunafa will thank you for it, and your guests will be raving about your skills!
Using Incorrect Cheese Ratio
While it might be tempting to throw in any amount of cheese you have on hand, using the incorrect cheese ratio can ruin your kunafa. The key is to blend cheeses that melt well, like mozzarella or akawi, in the right proportions.
Too much cheese can make the kunafa greasy and heavy, while too little leaves it dry and lacking flavor. Aim for a balanced mix; usually, a 50-50 ratio works wonders. Remember, the goal is that perfect stretch without overwhelming your dessert.
Also, consider the saltiness of the cheese—if you’re using a saltier variety, you might want to tweak the amount. Getting the cheese ratio right makes all the difference in achieving that melted kunafa perfection!
Serve Warm for Best Flavor
To truly savor the exquisite flavors of melted kunafa, you should serve it warm. When it comes out of the oven, the gooey cheese and crispy layers combine to create a heavenly experience.
If you let it cool, the texture changes, and you’ll miss that delightful contrast. Serve it immediately, and watch as the cheese stretches deliciously with each bite.
Pair it with a drizzle of syrup or a sprinkle of nuts to enhance the flavors further. The warmth also helps the syrup absorb better, making every mouthful irresistible.
Frequently Asked Questions
Can I Use Store-Bought Kunafa Dough?
Yes, you can use store-bought kunafa dough! It saves time and effort, letting you focus on filling and baking it to perfection. Just make sure to handle it carefully for the best results. Enjoy!
How Long Can Leftovers Be Stored?
You can store leftover kunafa in the fridge for up to three days. Just make sure it’s in an airtight container. If you want to keep it longer, freeze it for up to three months.
Is Kunafa Gluten-Free?
No, kunafa isn’t gluten-free. It’s traditionally made with semolina or phyllo dough, both containing gluten. If you’re looking for gluten-free options, consider alternative recipes that use gluten-free ingredients to create a similar dessert experience.
Can I Freeze Kunafa Before Baking?
Yes, you can freeze kunafa before baking. Just wrap it tightly in plastic wrap or aluminum foil, and store it in an airtight container. When ready, bake it straight from the freezer for delicious results.
What Variations Exist for Kunafa Fillings?
You can fill kunafa with options like sweet cheese, nuts, chocolate, or even fruit. Each variation offers a unique flavor experience, so experiment and find what satisfies your taste buds best! Enjoy the delicious possibilities!
Conclusion
In conclusion, mastering melted kunafa perfection is all about balancing textures and flavors. By using finely shredded dough, generous amounts of clarified butter, and a rich cheese filling, you’ll create a delightful dish. Remember to drizzle with a sweet syrup and serve warm for the best experience. Avoid common mistakes, and you’ll impress everyone with your kunafa. So go ahead, gather your ingredients, and enjoy every delicious bite of this decadent treat!