
If you’re looking to elevate your dinner with a crispy golden fried tilapia, you’ve come to the right place. The key lies in the right seasonings and technique. You’ll want to ensure your fillets are perfectly marinated and fried to achieve that delightful crunch. But there are a few essential tips to keep in mind that can make all the difference. Let’s explore the steps that will lead you to a restaurant-quality dish at home.
What Is Tilapia Fish?
Tilapia is a popular freshwater fish known for its mild flavor and versatile cooking options. It’s often farmed and widely available, making it a go-to choice for many home cooks.
This fish typically has a white, flaky texture that absorbs seasonings well, allowing you to create a variety of dishes. Tilapia is low in calories and high in protein, making it a healthy option for your meals.
You’ll often find it in recipes ranging from grilled to baked, and it pairs beautifully with different accompaniments. As you explore cooking tilapia, you’ll discover how easy it’s to incorporate into your diet, whether you’re a novice or an experienced chef.
It’s a reliable choice for satisfying meals.
Essential Seasonings
When it comes to making crispy fried tilapia, the right seasonings can really elevate your dish. You’ll want to focus on vibrant flavors that complement the fish. Here are some essential seasonings to consider:
- Fresh tilapia fillets
- Herb-infused garlic butter
- Lemon zest
- Paprika
- Sea salt
Fresh Tilapia Fillets
Fresh tilapia fillets are a blank canvas for flavor, and the right seasonings can elevate your dish. You’ll want to choose seasonings that complement the mild taste of tilapia without overpowering it.
Here are some essential seasonings to consider:
- Salt: Enhances the natural flavor.
- Black pepper: Adds a subtle heat.
- Paprika: Gives a hint of smokiness and color.
- Garlic powder: Infuses a savory depth.
- Lemon zest: Brightens up the overall flavor profile.
Mix these seasonings together and generously coat your fillets before frying.
This combination not only brings out the best in the tilapia but also sets the stage for delicious results that will have everyone asking for seconds!
Herb-Infused Garlic Butter
To take your crispy fried tilapia to the next level, consider adding a rich, herb-infused garlic butter. This delicious topping not only enhances the flavor but also adds a luxurious touch to your meal.
Here’s how to whip it up:
- Unsalted Butter: Start with a good quality butter for a creamy base.
- Garlic: Mince fresh garlic to infuse that robust flavor.
- Fresh Herbs: Use a mix of parsley, dill, and thyme for brightness.
- Lemon Zest: Add zest for a citrusy kick that complements the fish.
- Salt and Pepper: Season to taste for that perfect balance.
Drizzle this butter over your fried tilapia just before serving, and watch everyone rave about the flavor!
Detailed Cooking Instructions
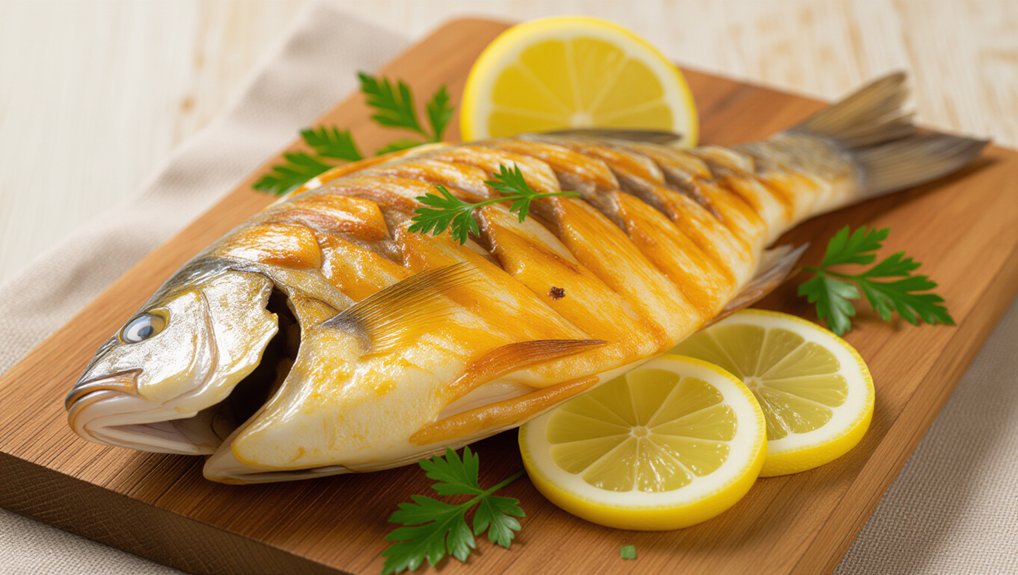
To make your tilapia crispy and flavorful, start by marinating it with lemon zest to enhance the taste.
Next, fry it until it’s golden brown for that perfect crunch.
Finally, don’t forget to garnish with fresh herbs for a vibrant finish.
Marinate With Lemon Zest
A simple yet effective way to enhance the flavor of your tilapia is by marinating it with lemon zest. This bright, citrusy addition elevates the dish and pairs beautifully with herbs.
Here’s how to do it:
- Zest one fresh lemon to release its essential oils.
- Combine the zest with olive oil, salt, and pepper in a bowl.
- Add your favorite herbs, like parsley or thyme, for extra flavor.
- Coat the tilapia fillets thoroughly, ensuring they’re well-covered.
- Let the fish marinate for at least 30 minutes, allowing the flavors to meld.
Fry Until Golden Brown
Heat a generous amount of oil in a large skillet over medium-high heat until it shimmers.
Carefully add the marinated tilapia fillets, ensuring they don’t overcrowd the pan. Fry for about 3-4 minutes on each side, or until they turn a beautiful golden brown.
Here are some tips to achieve that perfect crisp:
- Use a thermometer to check oil temperature (around 350°F).
- Don’t flip the fish too early; let it form a crust.
- Pat the fillets dry before frying to reduce splatter.
- Avoid moving the fish around; let it cook undisturbed.
- Drain the fried tilapia on paper towels to remove excess oil.
Once golden, remove the fillets and get ready to elevate their flavor with fresh herbs!
Garnish With Fresh Herbs
Fresh herbs can elevate your crispy fried tilapia, adding vibrant flavors and a pop of color. After frying, take a moment to garnish your dish with fresh herbs for an aromatic touch.
Here’s how you can do it:
- Choose Your Herbs: Opt for parsley, cilantro, dill, or basil based on your preference.
- Chop Finely: Use a sharp knife to chop the herbs finely, releasing their essential oils.
- Sprinkle Generously: Evenly sprinkle the chopped herbs over the tilapia for a beautiful presentation.
- Add Zest: To enhance the flavor, consider adding a little lemon zest along with the herbs.
- Serve Immediately: Enjoy your dish right away for the best texture and taste.
This simple step makes your meal feel gourmet!
Cooking Time and Servings
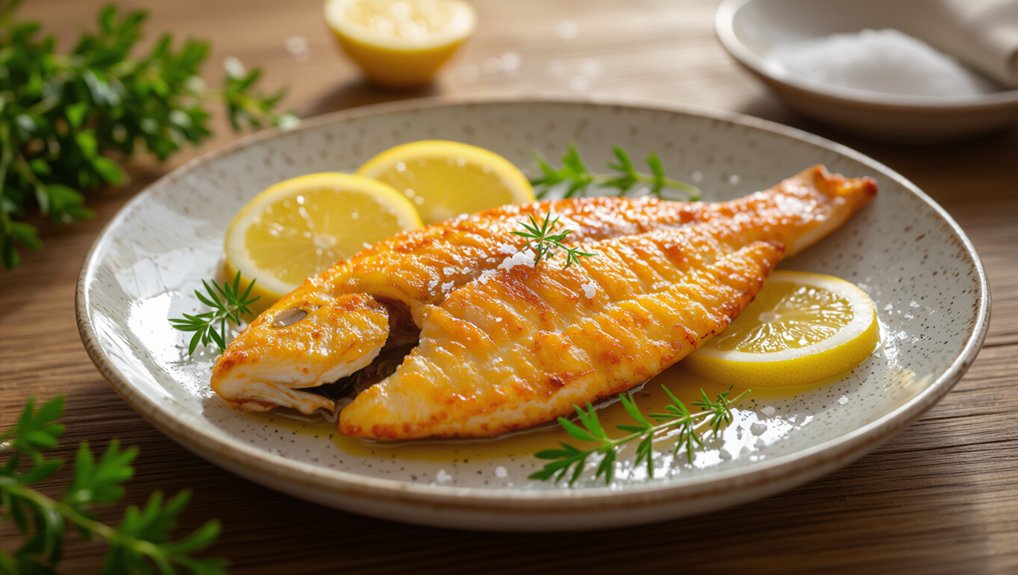
Crispy Fried Tilapia
A delightful dish featuring golden-brown tilapia with a tender, flaky interior.
Ingredients
- 4 tilapia fillets
- 1 cup flour
- 1 tsp salt
- 1/2 tsp pepper
- 1/2 tsp paprika
- Oil for frying
- Lemon wedges (for serving)
Instructions
- In a bowl, mix flour, salt, pepper, and paprika.
- Coat each tilapia fillet in the flour mixture.
- Heat oil in a frying pan over medium heat.
- Fry each fillet for 3-4 minutes per side until golden brown.
- Remove and let drain on paper towels.
- Serve with lemon wedges and your favorite salad.
Use a Cast-Iron Skillet
Using a cast-iron skillet can transform your fried tilapia into a crispy delight. This method not only ensures even cooking but also enhances flavor.
Here are some benefits and tips to keep in mind:
- Retains heat for even cooking
- Develops a natural non-stick surface
- Preheat to get that perfect crispy crust
- Easy to maintain with simple cleaning
- Durable for long-lasting use
Benefits Of Cast-Iron
A cast-iron skillet is a kitchen essential that offers multiple benefits for frying tilapia. First, it retains heat exceptionally well, ensuring your fish gets that perfect golden crust without losing temperature during cooking. This means you’ll achieve a crispy exterior while keeping the inside tender and moist.
Second, cast iron naturally develops a non-stick surface over time, which is perfect for delicate fish like tilapia. You won’t have to worry about your fillets falling apart.
Additionally, cast iron is incredibly durable and can last a lifetime with proper care, making it a worthwhile investment. Plus, it adds a classic touch to your kitchen.
With a cast-iron skillet, you’re set up for frying success!
Preheating For Perfect Crisp
To achieve that perfect crispy texture when frying tilapia, preheating your cast-iron skillet is essential. Start by placing your skillet on medium heat for about 5 to 10 minutes. You want it hot enough that a drop of water sizzles and evaporates quickly.
This high temperature creates an initial sear, locking in moisture and forming a golden crust. Once it’s ready, add a generous amount of oil, ensuring it coats the bottom evenly.
Wait for the oil to shimmer before gently placing your seasoned tilapia fillets in the skillet. Avoid overcrowding the pan; this helps maintain that crispy exterior.
With the right preheating and oil temperature, you’ll enjoy perfectly fried tilapia every time.
Maintenance Tips For Longevity
Keeping your cast-iron skillet in top shape ensures it lasts for generations.
First, always season it after each use. Wipe it down with a thin layer of oil to maintain that non-stick surface.
When cleaning, avoid harsh soaps and steel wool; instead, use warm water and a soft sponge. If food sticks, scrub it gently with coarse salt and a little water.
After cleaning, dry it completely to prevent rust. Store it in a dry place, ideally with a paper towel inside to absorb moisture.
If you notice any rust, don’t panic—simply scrub it off and re-season.
Treat your skillet well, and it’ll reward you with delicious, crispy meals for years to come!
Caloric Content per Serving
When you indulge in a serving of crispy fried tilapia, you’re looking at approximately 300 to 400 calories, depending on the cooking method and portion size. This makes it a delightful option that won’t completely derail your diet. Here’s a quick breakdown of the caloric content based on different factors:
| Factor | Calories |
|---|---|
| Tilapia (4 oz) | 180 |
| Breading (1/4 cup) | 100 |
| Oil (1 tbsp) | 120 |
| Total (average) | 400 |
Keep in mind that adding herbs and lemon can enhance flavor without significantly boosting calories. Enjoy your meal while being mindful of the ingredients you use!
Overcrowding the Frying Pan
Overcrowding the frying pan can ruin your quest for crispy fried tilapia, as it leads to uneven cooking and a soggy texture.
To achieve that golden crunch, keep these tips in mind:
- Use a large enough pan: Ensure you have space for each fillet.
- Fry in batches: Cook smaller portions to maintain temperature.
- Don’t stack the fish: Lay each piece flat for even heat distribution.
- Monitor oil temperature: Keep it hot; overcrowding cools it down.
- Avoid frequent flipping: Let them cook undisturbed for a perfect crust.
Crispy Toppings for Extra Crunch
To take your crispy fried tilapia to the next level, consider using panko breadcrumbs for a light, airy crunch.
If you’re after a heartier texture, a cornmeal crust can add a delightful grit that enhances every bite.
Experiment with these toppings to find your perfect balance of crunch!
Panko Breadcrumb Coating
For a perfectly crispy fried tilapia, the panko breadcrumb coating is your secret weapon. This unique coating adds an irresistible crunch and enhances the overall flavor. Here’s how to make it work for you:
- Choose quality panko: Opt for coarse, Japanese-style panko for maximum crunch.
- Season the breadcrumbs: Mix in herbs, spices, or grated cheese to elevate the flavor.
- Double dip: Dip the tilapia in flour, then egg, before coating it with panko for a thicker crust.
- Press firmly: Make sure to press the panko into the fish to ensure it sticks well during frying.
- Fry at the right temperature: Ensure your oil is hot enough for a golden, crispy finish.
Enjoy that delightful crunch with every bite!
Cornmeal Crust for Texture
While panko breadcrumbs deliver a satisfying crunch, a cornmeal crust brings a unique texture that elevates your fried tilapia. This golden coating not only adds flavor but also enhances the dish’s overall appeal.
Here’s why you should consider using cornmeal:
- Extra Crunch: Cornmeal creates a delightful crunch that’s hard to resist.
- Flavor Boost: It enhances the natural sweetness of the fish.
- Colorful Appearance: The golden hue looks appetizing and inviting.
- Easy to Work With: It adheres well to the fish, making preparation straightforward.
- Versatile Seasoning: You can easily customize it with herbs and spices.
Using a cornmeal crust will make your tilapia not just a meal, but an experience that’s sure to impress. Enjoy!
Common Cooking Inquiries
When cooking tilapia, you might wonder about the best techniques to use or how to pick the freshest fish.
Understanding essential cooking methods and seasoning options can really elevate your dish.
Let’s explore these common inquiries to help you master crispy fried tilapia!
Essential Cooking Techniques
Mastering essential cooking techniques can elevate your fried tilapia from good to unforgettable. Start by properly seasoning your fish; a blend of salt, pepper, and your favorite herbs will enhance its flavor.
Next, ensure your oil is hot enough before adding the tilapia; this helps achieve that crispy exterior. Use a thermometer to check the oil’s temperature, aiming for around 350°F (175°C).
When frying, don’t overcrowd the pan—this can lower the oil temperature and make your fish soggy. Flip the tilapia gently to avoid breaking it apart.
Finally, draining the fried fish on paper towels absorbs excess oil, keeping it crispy. With these techniques, your tilapia will shine on any plate!
Choosing Fresh Ingredients
Choosing fresh ingredients is key to making your fried tilapia truly stand out. Start with the fish—look for tilapia fillets that are bright in color and smell clean, not fishy. Fresh fish should feel firm to the touch and have moist, shiny skin.
When it comes to herbs and spices, opt for vibrant, fragrant options like parsley or dill. If you’re using lemon, choose ones that are heavy for their size, indicating juiciness. Fresh garlic adds an aromatic punch, so select bulbs that are plump and free from any sprouts.
Lastly, don’t forget about your cooking oil; a high-quality oil will enhance flavor and texture. These fresh ingredients will elevate your dish and ensure a delightful meal.
Common Seasoning Options
There’s no shortage of seasoning options that can elevate the flavor of your crispy fried tilapia. Start with the basics: salt and pepper, which enhance the fish’s natural taste.
For a zesty kick, consider garlic powder, paprika, or cayenne pepper. If you’re after a fresh twist, mix in dried herbs like thyme, oregano, or dill. A touch of lemon zest can brighten everything up, too.
For a more exotic flavor, try cumin or coriander. If you prefer a savory depth, a dash of soy sauce or Worcestershire sauce can do wonders.
Don’t forget to experiment with combinations until you find your perfect blend. The right seasoning can make your tilapia unforgettable!
Serve With Tartar Sauce
While crispy fried tilapia shines on its own, pairing it with tartar sauce elevates the dish to new heights. This creamy, tangy condiment complements the fish’s flavors perfectly and adds a delightful contrast to its crunch.
To make a simple tartar sauce, mix mayonnaise with chopped pickles, capers, lemon juice, and a dash of salt and pepper. You can also customize it by adding herbs like dill or parsley for an extra burst of freshness.
When serving, place a generous dollop of tartar sauce alongside your tilapia on the plate. This way, you can dip each bite for a zesty kick.
Trust us, the combination of crispy fish and tartar sauce will leave everyone craving more! Enjoy your delicious creation!
Frequently Asked Questions
Can I Use Frozen Tilapia for This Recipe?
Yes, you can use frozen tilapia for this recipe. Just make sure to thaw it completely before cooking. This’ll ensure even cooking and help you achieve that crispy, golden texture you’re aiming for.
What Side Dishes Pair Well With Fried Tilapia?
You can pair fried tilapia with coleslaw, garlic mashed potatoes, or a fresh garden salad. Rice pilaf and steamed asparagus also complement it nicely, adding balance to the meal’s flavors and textures. Enjoy!
How Do I Store Leftover Fried Tilapia?
To store leftover fried tilapia, let it cool, then wrap it tightly in plastic wrap or aluminum foil. Place it in an airtight container and refrigerate for up to three days for best freshness.
Can I Substitute Tilapia With Another Fish?
Yes, you can substitute tilapia with other firm white fish like cod or haddock. Just adjust cooking times slightly, and you’ll still enjoy a deliciously crispy dish with your favorite flavors.
What Oil Is Best for Frying Tilapia?
You’ll want to use oils with high smoke points, like canola, vegetable, or peanut oil, for frying tilapia. These oils create a crispy texture while minimizing burning, ensuring your fish turns out perfectly golden.
Conclusion
Now that you know how to make crispy golden fried tilapia with lemon and herbs, it’s time to impress your family and friends! Enjoy the delightful crunch and zesty flavors that elevate this simple dish. Don’t forget to serve it with lemon wedges and your favorite tartar sauce for an extra kick. Dive into this delicious meal, and savor every bite. Happy cooking!