
When you think about making a panini, the first thing that comes to mind is that perfect balance of crispy bread and melted cheese. Choosing the right ingredients is crucial, from the type of bread to the fillings you select. Each component plays a role in crafting a satisfying sandwich. So, what makes a panini truly stand out? Let’s explore the essentials to elevate your next creation.
What Is a Panini?
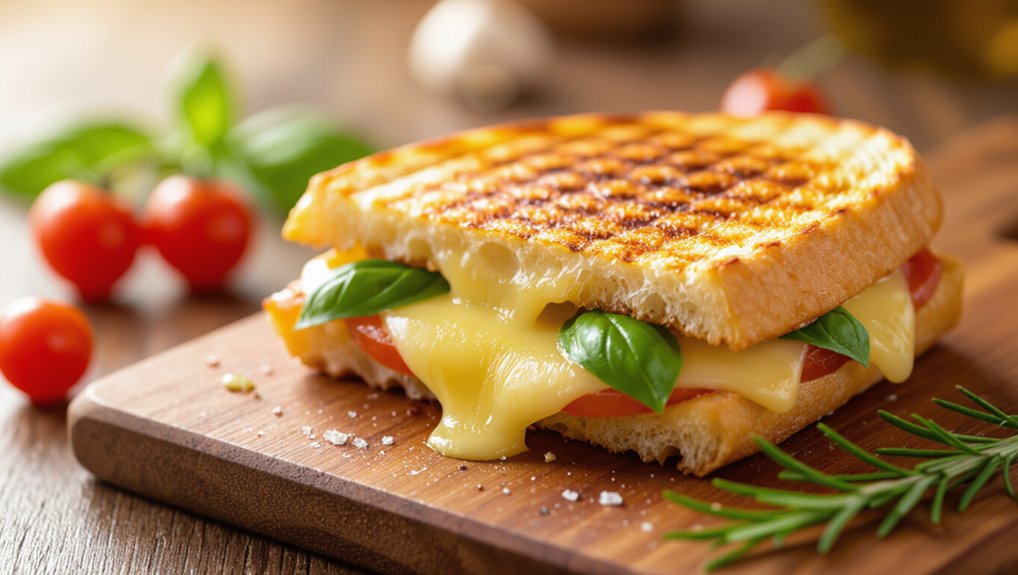
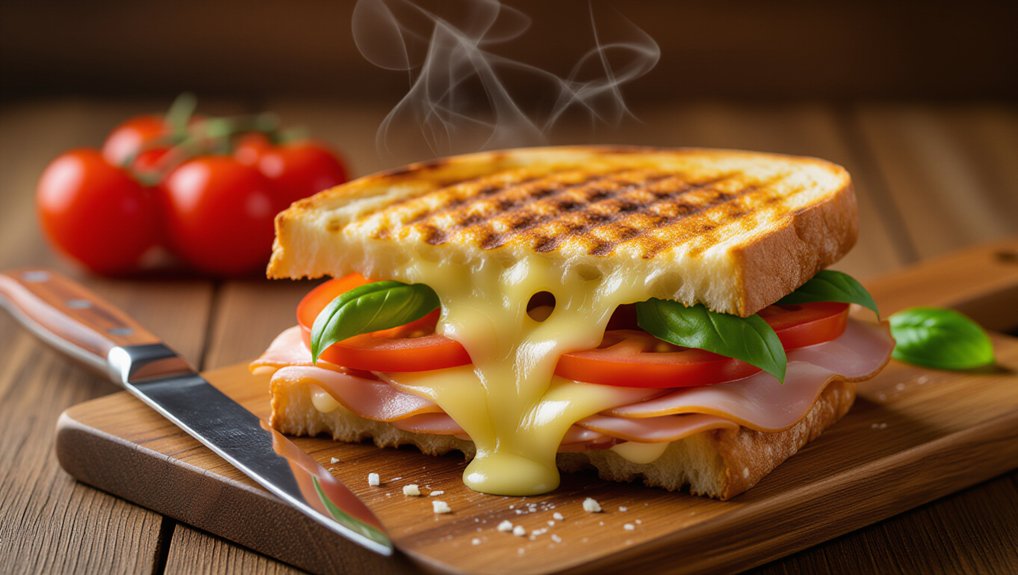
A panini is more than just a sandwich; it’s a culinary delight. You’ve got grilled bread, often pressed to create that perfect crispy crust.
Inside, you’ll find a variety of delicious fillings, from savory meats to fresh vegetables and delectable cheeses. The magic happens when heat melds everything together, making each bite a blend of textures and flavors.
You can customize your panini to suit your taste, whether you crave something classic or want to experiment with bold combinations. It’s not just a meal; it’s an experience.
Pair it with a side salad or some chips, and you’ve got a satisfying lunch or dinner that’s both simple and sophisticated.
Essential Bread Choice
When it comes to crafting the perfect panini, your choice of bread sets the foundation for flavor and texture.
You’ll want something that complements your cheese, cured meats, and any flavorful vegetable toppings you choose.
Let’s explore how selecting the right bread can elevate your panini experience.
- Crunchy crust for that satisfying bite
- Soft interior to hold all the ingredients
- Bread type that enhances overall flavor
Cheese and Cured Meats
For the perfect panini, choosing the right cheese and cured meats is essential. The combination of flavors and textures can elevate your sandwich from good to extraordinary.
Look for cheeses that melt beautifully and offer a rich taste, like:
- Mozzarella: Creamy and stretchy, perfect for that gooey texture.
- Gruyère: Nutty and slightly sweet, it adds depth to your panini.
- Provolone: Sharp and tangy, it complements a variety of cured meats.
Pair these cheeses with high-quality cured meats to enhance flavor. Options like prosciutto, salami, or capicola can bring a savory richness that balances the cheese’s creaminess.
Flavorful Vegetable Toppings
Vegetable toppings can transform your panini into a vibrant, flavorful masterpiece. Fresh, colorful veggies not only add crunch but also enhance the overall taste.
When choosing your toppings, think about balance and texture. Here are some great options to consider:
- Roasted Red Peppers: Sweet and smoky, they elevate any sandwich.
- Spinach or Arugula: These greens add a peppery bite and freshness.
- Sliced Avocado: Creamy and rich, it brings a luxurious feel.
Mix and match these toppings to create a panini that bursts with flavor.
Don’t forget to season your veggies with a touch of salt and pepper for that extra zing. With these vegetable toppings, your panini will be the talk of the table!
Detailed Cooking Instructions
Now that you’ve picked the perfect bread, it’s time to assemble your ingredients and season them just right.
Grill your panini until it’s golden brown, creating that irresistible crunch.
Finally, don’t forget to garnish with fresh herbs for that extra pop of flavor!
Ingredient Assembly and Seasoning
As you prepare to assemble your panini, gather all your ingredients to ensure a smooth cooking process. Start with your bread—choose something hearty like ciabatta or sourdough.
Then, select your fillings, balancing flavors and textures. Don’t forget to season well; a pinch of salt and a sprinkle of pepper can elevate your panini.
- Fresh herbs like basil or oregano
- A drizzle of olive oil for richness
- A dash of garlic powder for extra flavor
Layer your ingredients thoughtfully—place cheese closest to the bread to melt perfectly. Add your chosen meats or veggies, and top with more cheese to create that crispy, cheesy goodness.
Now you’re ready to grill!
Grill Until Golden Brown
Heat your grill or panini press to medium-high, ensuring it’s hot enough to create that perfect golden crust.
Carefully place your assembled panini on the grill, pressing it down slightly. Keep an eye on it, as cooking times may vary. In about 3-5 minutes, check for that beautiful golden brown color.
Flip the panini using a spatula, allowing the other side to achieve the same crispy finish.
- Use a light spread of butter on the outside for extra flavor.
- If using a pan, weigh it down with a skillet or another heavy object for even grilling.
- Avoid opening the grill too frequently; let the heat do its magic!
Once both sides are golden, remove the panini and enjoy!
Garnish With Fresh Herbs
Garnishing your panini with fresh herbs can elevate its flavor and presentation, making it truly irresistible. A sprinkle of vibrant herbs not only enhances taste but also adds a pop of color.
Here’s how to do it effectively:
- Choose Your Herbs: Basil, parsley, or arugula work wonderfully. Pick ones that complement your panini fillings.
- Chop or Tear: For a fresher look, tear the herbs by hand. If you prefer a finer texture, chop them roughly.
- Sprinkle Generously: After grilling, add your herbs while the panini is still warm. This helps to release their aromatic oils.
Panini Assembly Guide
Delicious Panini Recipe
Creating a delicious panini is all about the assembly process. With the right ingredients and careful layering, you can achieve a perfect crispy finish every time!
Ingredients:
- 2 slices of ciabatta or sourdough bread
- Butter or olive oil
- Cheese (your choice)
- Protein (e.g., turkey, ham, or chicken)
- Vegetables (e.g., spinach, tomatoes, or bell peppers)
- Seasoning or herbs (optional)
Instructions:
- Start with your bread; lay down a slice and spread a thin layer of butter or olive oil for that golden crisp.
- Layer your ingredients, starting with cheese, then adding proteins and veggies.
- Be mindful not to overload it to avoid sogginess.
- Sprinkle some seasoning or herbs for added flavor.
- Top it off with another slice of bread, pressing gently to secure everything in place.
- Heat up your panini press or skillet to achieve that perfect crispy finish.
Use a Hot Press
Using a hot press can elevate your panini-making game to the next level. You’ll need to know the right temperature settings and effective pressing techniques to get that perfect crunch.
Let’s also cover how to keep your equipment in top shape for consistent results.
- Ideal Temperature Settings
- Pressing Techniques Explained
- Equipment Maintenance Tips
Ideal Temperature Settings
When you’re ready to elevate your panini game, setting the right temperature on your hot press is crucial. Aim for around 375°F (190°C) for that perfect balance of crispy exterior and melted interior.
Preheat your press for about 10 minutes to ensure even cooking. If you’re using thicker bread or extra fillings, consider increasing the temperature slightly to 400°F (204°C), but keep an eye out to prevent burning.
Remember, the goal is to achieve that golden-brown crust while allowing the cheese to melt beautifully. Experiment with your settings based on bread type and filling thickness, but don’t rush it.
A consistently maintained temperature leads to a deliciously satisfying panini every time. Enjoy the process!
Pressing Techniques Explained
To achieve the perfect panini, mastering your pressing technique is essential. Start by preheating your hot press to the ideal temperature; this ensures even cooking.
When you place your assembled sandwich inside, close the press gently but firmly. Apply consistent pressure without squishing the ingredients out. It’s all about finding the right balance—too little pressure won’t create that crispy crust, while too much can flatten the bread.
Keep an eye on the cooking time; typically, 3-5 minutes will do the trick. If you’re aiming for extra crispiness, consider flipping the panini halfway through.
Finally, once it’s golden brown and the cheese is gooey, remove it and let it rest for a minute before slicing. Enjoy your delicious creation!
Equipment Maintenance Tips
Although a hot press is essential for crafting the perfect panini, keeping it in top shape is equally important.
Start by cleaning it after each use. Wipe down the plates with a damp cloth to remove any food residue, and always let it cool first. For stubborn stains, use a non-abrasive cleaner.
Regularly check the hinges and plates for wear. If they’re loose or damaged, it’s time for a replacement. Ensure the power cord is intact and free from frays.
Occasionally, you should season the plates with a light coating of oil to maintain their non-stick surface.
Finally, store your hot press in a dry area to prevent rust and ensure longevity. Your paninis will thank you!
Caloric Content per Serving
Understanding the caloric content per serving of a panini is essential for making informed dietary choices. Generally, a typical panini can range from 400 to 600 calories, depending on the ingredients you choose. If you’re looking to make healthier choices, consider the fillings and portion sizes.
Here’s a quick reference to help you gauge the caloric content:
| Ingredient | Calories per Serving |
|---|---|
| Grilled Chicken | 165 |
| Cheese (1 slice) | 100 |
| Pesto (1 tbsp) | 80 |
| Bread (2 slices) | 120 |
Ignoring Bread Thickness
When you’re crafting the perfect panini, ignoring bread thickness can significantly impact your meal’s overall caloric count and texture. Choosing a thicker loaf can lead to a heartier sandwich, while thinner bread allows for a crispier bite.
If you want the ideal balance, consider these tips:
- Choose Wisely: Opt for bread that complements your fillings. Sourdough adds tang, while ciabatta offers airiness.
- Mind the Calories: Thicker bread means more calories, so keep that in mind if you’re counting.
- Experiment: Try different thicknesses to see what works best for your taste. Sometimes, a slight change makes all the difference.
Ultimately, bread thickness plays a crucial role in achieving that crispy, cheesy goodness you crave.
Creative Spreads and Dips
When you think about spreads and dips for your panini, don’t settle for the usual options.
Experiment with unique flavor combinations and unexpected ingredient swaps to elevate your sandwiches. You might just discover a new favorite that surprises your taste buds!
Unique Flavor Combinations
As you explore the world of paninis, don’t overlook the power of unique flavor combinations that can elevate your meal.
Creative spreads and dips can transform even the simplest sandwich into a gourmet experience. Consider blending textures and tastes to surprise your palate.
Here are some exciting ideas to get you started:
- Spicy Honey Mustard: Mix honey with a kick of Dijon for a sweet and tangy spread.
- Avocado Hummus: Combine avocado with traditional hummus for a creamy, nutrient-packed layer.
- Pesto Cream Cheese: Spread a layer of cream cheese infused with pesto for rich, herby flavor.
Experimenting with these combinations will undoubtedly make your panini game stronger.
Enjoy the delicious journey!
Unexpected Ingredient Swaps
Exploring unique flavor combinations opens the door to unexpected ingredient swaps that can elevate your panini even further.
Try experimenting with creative spreads and dips to enhance your sandwich experience. Here are a few ideas to get you started:
- Avocado Hummus: Use this creamy spread instead of traditional mayo for a healthy twist.
- Pesto & Cream Cheese: Mix these two for a rich, herbaceous spread that’s perfect with grilled veggies.
- Spicy Sriracha Aioli: Blend sriracha with mayo for a zesty kick that pairs beautifully with meats and cheeses.
These swaps not only add flavor but also surprise your taste buds.
Common Panini Mistakes
When making a panini, it’s easy to make some common mistakes that can ruin your sandwich.
Overstuffing, skipping the pressing step, and using low-quality ingredients can all lead to a less-than-perfect result.
Let’s explore these pitfalls so you can elevate your panini game.
Overstuffing The Sandwich
While you might be tempted to pile on your favorite ingredients, overstuffing a panini can lead to a soggy mess. When you cram too much filling inside, the bread can’t crisp up properly, and moisture builds up.
Instead of a delightful crunch, you’ll end up with a squishy sandwich that’s hard to handle. Aim for a balanced filling—enough to satisfy your cravings but not so much that it spills out.
A good rule of thumb is to stick to about two ounces of cheese and a couple ounces of other ingredients. This way, you’ll enjoy that perfect combination of crispy bread and gooey cheese without sacrificing texture.
Skipping The Pressing Step
Overstuffing your panini can lead to sogginess, but skipping the pressing step is another common mistake that can ruin your creation.
When you don’t press your panini, it misses that crucial crunch and melty goodness. The pressure helps meld the flavors and ensures even toasting, giving you a delightful contrast between the crispy exterior and the warm filling.
Without pressing, you might end up with a sandwich that’s more like a flatbread than a panini. If you don’t have a panini press, a heavy skillet or another pan can work just as well.
Just be sure to apply even pressure for a few minutes so everything comes together beautifully. Trust us, the extra effort is worth it!
Using Low-Quality Ingredients
Using low-quality ingredients can seriously undermine your panini’s potential. When you choose stale bread or processed cheese, you’re setting yourself up for disappointment.
Fresh, artisanal bread provides that perfect crust, while high-quality cheese melts beautifully, adding richness to every bite. Don’t skimp on fresh veggies either; wilted or bland produce can ruin the flavor profile you’re aiming for.
Opt for seasonings and spreads made from whole ingredients instead of those packed with preservatives. Remember, the best paninis come from the best ingredients.
Experiment With Ingredient Pairings
To create a truly memorable panini, it’s essential to experiment with ingredient pairings that excite your palate. Start by mixing textures; combine creamy cheeses like brie with crunchy veggies, or try tangy goat cheese with roasted peppers.
Don’t shy away from contrasting flavors, either—sweet fig jam pairs beautifully with salty prosciutto, while zesty pesto livens up classic mozzarella and tomatoes. You can also play with spices; a sprinkle of crushed red pepper can elevate a simple turkey and cheese combo.
Remember to think outside the box—add fruits like apples or pears for an unexpected twist. Each new combination is an opportunity to discover your next favorite panini creation, so have fun and get creative!
Frequently Asked Questions
Can I Make Paninis Without a Press?
Yes, you can definitely make paninis without a press! Simply use a heavy skillet or another pan on top to press them down while cooking. You’ll still achieve that crispy, delicious result you crave.
What Fillings Work Best for Vegetarian Paninis?
For vegetarian paninis, try fillings like roasted vegetables, spinach, mozzarella, pesto, or hummus. You can also mix in artichokes, sun-dried tomatoes, and avocado for extra flavor. Get creative and enjoy experimenting with combinations!
How Do I Store Leftover Paninis?
To store leftover paninis, wrap them in foil or parchment paper and place them in an airtight container. Refrigerate for up to three days, then reheat in a skillet or oven for best results.
Can I Freeze Paninis for Later Use?
Yes, you can freeze paninis for later use. Just wrap them tightly in plastic wrap or foil, then place them in an airtight container. When you’re ready, reheat them straight from the freezer. Enjoy!
What Sides Pair Well With Paninis?
You can pair your paninis with a crisp salad, sweet potato fries, or a warm bowl of soup. These sides balance the richness, adding freshness and texture to your delicious meal. Enjoy your perfect combo!
Conclusion
Now that you know how to create the perfect panini, it’s time to get cooking! Experiment with different breads, cheeses, and fillings to find your favorite combinations. Don’t forget to use a hot press for that crispy finish, and feel free to try out creative spreads and dips. Avoid common mistakes, and remember to enjoy the process. With a little practice, you’ll be whipping up delicious paninis that impress everyone at the table!