

Creating creamy swirls of chocolate and peanut butter joy is simpler than you might think. You’ll need to combine high-quality ingredients and master a few techniques to achieve that perfect marbled effect. Start by preparing your chocolate and peanut butter mixtures separately, but there are a few key tips to keep in mind. Understanding these can make all the difference in your final outcome. Let’s explore how to elevate your dessert game effortlessly.
What Is Chocolate Swirl Technique?
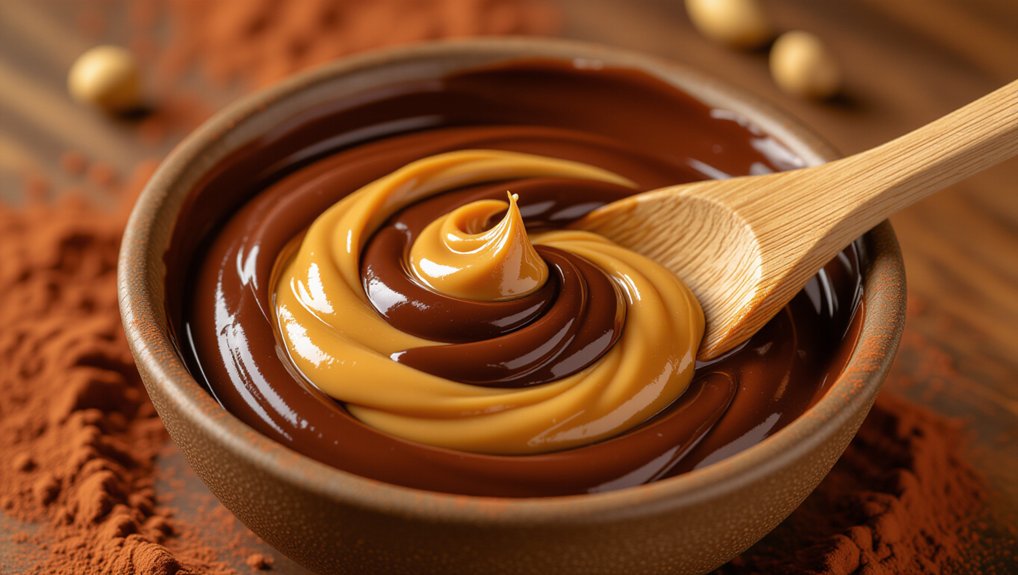
The chocolate swirl technique is a delightful method that transforms simple mixtures into visually appealing treats. You start by preparing your chocolate and peanut butter mixtures separately, ensuring each has a smooth consistency.
Once they’re ready, you’ll spoon dollops of each into your desired base, like brownie batter or yogurt. Using a skewer or knife, gently swirl the mixtures together, being careful not to overmix. This creates a beautiful marbled effect that’s both eye-catching and delicious.
The key is to maintain the distinct layers while blending just enough to achieve that enticing swirl. This technique not only elevates the presentation but also enhances the flavor, making each bite a delightful surprise.
Enjoy the process and let your creativity shine!
Essential Components for Success
To create the perfect chocolate and peanut butter swirls, you need a few key ingredients that really shine. Rich chocolate and creamy peanut butter are essential, but don’t forget about the finishing touches that add texture and flavor.
Here’s what you’ll want to have on hand:
- High-quality chocolate
- Smooth peanut butter
- Flavorful nut toppings
Rich Chocolate and Creamy Peanut Butter
When you combine rich chocolate with creamy peanut butter, the result is a delectable harmony that elevates any dessert. This pairing isn’t just about flavor; it’s about texture too. The smoothness of peanut butter complements the luscious depth of chocolate, creating a delightful experience for your taste buds.
To achieve the perfect blend, keep these essential components in mind:
- Quality Ingredients: Use high-quality chocolate and natural peanut butter for the best taste.
- Right Ratios: Aim for a balanced mix; too much of either can overpower the other.
- Temperature Control: Melt chocolate gently to maintain its gloss and prevent burning.
With these tips, you’re well on your way to creating irresistible chocolate and peanut butter swirls!
Flavorful Nut Toppings
While you might think chocolate and peanut butter are the stars of the show, flavorful nut toppings can elevate your dessert to another level.
Adding a crunchy texture and rich taste, nuts create a delightful contrast to the creamy swirls. Here are some great options to consider:
- Chopped Pecans: Their buttery flavor pairs beautifully with chocolate and peanut butter.
- Toasted Almonds: They add a hint of sweetness and a satisfying crunch.
- Crushed Hazelnuts: Their unique flavor profile brings an unexpected twist.
Detailed Preparation Instructions
Before you start, make sure all your ingredients are ready and organized.
Melting the chocolate and peanut butter correctly is crucial for that perfect swirl.
Finally, you’ll want to master an artful drizzle design to elevate your treat.
Ingredient Readiness and Organization
To ensure a smooth cooking process, gather all your ingredients and tools ahead of time. This preparation will save you from scrambling mid-recipe and help maintain your focus on creating those delicious swirls.
Here’s what you’ll need to have ready:
- Chocolate chips: Choose high-quality for the best flavor.
- Creamy peanut butter: Make sure it’s at room temperature for easy mixing.
- Mixing bowls and spatula: Have these handy to streamline your workflow.
Once you’ve got everything organized, you can dive right into the fun part—creating your chocolate and peanut butter masterpiece.
Being prepared not only enhances your efficiency but also makes the overall experience more enjoyable. Happy cooking!
Melting Chocolate and Peanut Butter
Start by heating your chocolate chips and peanut butter together to create a smooth, creamy mixture. You can use a microwave or a double boiler for this. If using a microwave, heat in short bursts, stirring in between to prevent burning. Aim for a velvety consistency that blends seamlessly.
- Use high-quality chocolate chips for the best flavor.
- Choose creamy peanut butter to ensure a smooth texture.
- Stir continuously while melting to achieve even heating.
Once melted, remove from heat and stir until fully combined. This luscious mix will serve as the foundation for your delicious swirls, ready to elevate your dessert experience!
Make sure to work quickly before it starts to set. Enjoy the process!
Artful Chocolate Drizzle Design
As you prepare to create an artful chocolate drizzle design, remember that a steady hand and a little creativity can transform your dessert into a stunning centerpiece.
First, use a piping bag or a fork to drizzle melted chocolate over your dessert. Start from the center and work your way outward for an elegant effect.
To enhance your drizzle, consider these tips:
- Temperature matters: Ensure your chocolate’s warm enough to flow smoothly but not too hot to lose shape.
- Practice makes perfect: Try on parchment paper first to refine your technique.
- Layer it up: Combine dark and white chocolate for a striking contrast.
With a few simple techniques, you’ll elevate your dessert presentation effortlessly!
Swirl Design Guide
Chocolate Peanut Butter Swirl Treats
Create an eye-catching swirl design in your chocolate and peanut butter treat to elevate its visual appeal and make it even more tempting.
Ingredients
- 1 cup chocolate chips
- 1 cup peanut butter
- 1/4 cup sweetener (sugar or alternative)
- 1/2 cup base (e.g., graham cracker crumbs)
Instructions
- In a bowl, melt the chocolate chips until smooth.
- In another bowl, mix peanut butter with sweetener until creamy.
- Layer dollops of chocolate and peanut butter on your base.
- Using a toothpick or skewer, gently swirl them together, maintaining distinct swirls.
- For a dramatic effect, alternate layers of chocolate and peanut butter before swirling.
- Experiment with patterns like figure eights or spirals.
- Allow to cool and set before serving.
Use Room Temperature Ingredients
Using room temperature ingredients is key to achieving the perfect chocolate and peanut butter swirls. It helps mix everything smoothly and enhances both texture and flavor.
Here’s why you shouldn’t skip this step:
- Promotes better incorporation of ingredients
- Ensures a creamy, consistent texture
- Amplifies the overall flavor profile
Importance Of Room Temperature
When you combine room temperature ingredients, you enhance the texture and flavor of your chocolate and peanut butter swirls. Cold ingredients can lead to a lumpy mixture, making it tough to achieve that smooth, creamy consistency you want.
By letting your butter, eggs, and peanut butter sit out for a bit, you’ll allow them to blend seamlessly, creating a luscious swirl. This simple step also ensures that your flavors meld beautifully, giving each bite that rich taste you crave.
Plus, working with room temperature ingredients speeds up the mixing process, saving you time in the kitchen. So, take a moment to prep your ingredients; it’s a small effort that makes a big difference in your final creation.
Enhances Ingredient Incorporation
Room temperature ingredients not only improve texture but also significantly enhance ingredient incorporation. When you use eggs, butter, or any dairy product at room temperature, they blend more easily with other ingredients. This means no lumps and a smoother batter, making it easier to create those luscious swirls of chocolate and peanut butter.
If you’ve ever tried mixing cold butter into a batter, you know how stubborn it can be. By allowing your ingredients to warm up, you facilitate better emulsification, which leads to a more homogenous mixture. This step is crucial for achieving the delightful balance of flavors and textures you crave in your treats.
Improves Texture And Flavor
To achieve the perfect chocolate and peanut butter swirls, incorporating room temperature ingredients can significantly enhance both texture and flavor. When your butter and eggs are at room temperature, they blend more easily, creating a smoother, creamier mixture.
This not only helps in achieving a velvety consistency but also allows the flavors to meld beautifully. Cold ingredients can lead to clumps and a less cohesive batter, which isn’t what you want for those delightful swirls.
Caloric Content per Serving
A single serving of chocolate and peanut butter swirls typically contains around 200 to 250 calories, depending on the specific recipe and portion size. This indulgent treat can fit into your daily caloric goals if you enjoy it in moderation. Here’s a quick breakdown of the caloric content based on common ingredients:
| Ingredient | Calories per Serving |
|---|---|
| Dark chocolate | 120 – 150 |
| Peanut butter | 80 – 100 |
| Swirl combination | 200 – 250 |
Overheating Chocolate Mixture
While melting chocolate for your swirls, it’s crucial to avoid overheating the mixture. Overheating can lead to a grainy texture and burnt flavor, ruining your delicious creation. Instead, use gentle heat and stir frequently to ensure smoothness.
Here are some tips to keep in mind:
- Use a double boiler: This method regulates temperature and prevents direct heat.
- Heat in short bursts: Microwave in 20-second intervals, stirring in between, until melted.
- Watch for visual cues: Look for shiny, glossy chocolate that’s just melted but not bubbling.
Nut Butter Flavor Swaps
If you’re looking to switch things up, consider trying crunchy almond butter or creamy cashew butter in your swirls.
Each option brings its own unique flavor and texture that can elevate your treat.
Don’t be afraid to experiment and find your favorite nut butter combination!
Crunchy Almond Butter Option
Choosing a crunchy almond butter option not only adds texture to your chocolate and peanut butter swirls but also introduces a delightful nutty flavor. This swap can elevate your treat, making each bite a unique experience.
Plus, almond butter is rich in vitamins and minerals, offering a healthful twist.
Consider these benefits when using crunchy almond butter:
- Texture Boost: The added crunch creates a satisfying contrast to the creamy elements.
- Flavor Depth: Almond butter’s subtle sweetness pairs beautifully with chocolate, enhancing overall taste.
- Nutritional Perks: It’s packed with healthy fats, protein, and fiber, making your indulgence a bit more guilt-free.
Creamy Cashew Butter Alternative
For a creamy twist on your chocolate and peanut butter swirls, consider using cashew butter as an alternative. Its smooth texture and mild flavor blend beautifully, complementing the richness of chocolate without overpowering it.
You’ll love how easy it’s to create decadent swirls with this nut butter.
Here are a few reasons to try cashew butter:
- Creamy Consistency: It spreads easily, allowing for effortless mixing with chocolate.
- Subtle Flavor: Cashew butter has a delicate taste that enhances rather than competes with chocolate.
- Nutrient-Rich: Packed with healthy fats, vitamins, and minerals, it’s a nutritious addition to your treats.
Try swapping in cashew butter for a delightful, creamy experience in your chocolate and peanut butter creations!
Common Swirl Technique Mistakes
When you’re swirling chocolate and peanut butter, it’s easy to make a few common mistakes.
Overmixing can ruin that beautiful marbled look, while incorrect temperatures can affect consistency.
Plus, using poor swirl techniques can leave your creation looking less than appetizing.
Overmixing Ingredients Too Much
While creating those delicious chocolate and peanut butter swirls, you might be tempted to mix everything thoroughly, but overmixing can ruin the effect. When you stir too much, you’ll lose that beautiful marbling and end up with a uniform color instead.
You want to maintain distinct layers of chocolate and peanut butter, so mix just until you see swirls forming. Use a gentle folding motion with a spatula to keep those rich, creamy textures intact.
If you push it too far, you’ll sacrifice the visual appeal and the delightful contrast of flavors. Remember, less is more—embracing the imperfect swirl adds charm to your dessert and enhances your taste experience.
Enjoy the process, and let those swirls shine!
Incorrect Temperature Balancing
Getting the temperatures of your chocolate and peanut butter right is crucial for achieving those stunning swirls. If your chocolate’s too hot, it can seize up the peanut butter, leading to a clumpy mess. On the flip side, if it’s too cool, you won’t get that smooth blend you’re aiming for.
Ideally, your chocolate should be warm but not scalding, around 90°F. Your peanut butter needs to be at a similar temperature to ensure they meld together effortlessly. Use a microwave in short bursts to warm them up, checking frequently.
This balance sets the stage for beautiful, creamy swirls. Pay attention to those temperatures, and you’ll be on your way to swirl perfection!
Poor Swirl Technique Execution
Mastering the swirl technique is key to creating those eye-catching chocolate and peanut butter designs, but common mistakes can derail your efforts.
One frequent error is using too much force while swirling; this can lead to an unappealing, muddy appearance. Instead, use gentle, fluid motions to maintain distinct layers.
Another mistake isn’t varying the swirl depth; shallow swirls can look flat, while deep swirls may mix too much. Aim for a balanced depth that showcases both ingredients.
Lastly, timing matters—swirling too late can cause the mixture to set, making it harder to achieve that perfect look.
With practice and attention to these details, you’ll elevate your swirling game and impress everyone with your beautiful creations.
Perfect for Dessert Lovers
If you’ve got a sweet tooth, chocolate and peanut butter swirls are a dream come true. These decadent treats combine rich chocolate with creamy peanut butter, creating a flavor explosion that’ll satisfy any dessert lover’s cravings.
Whether you’re topping brownies, drizzling over ice cream, or swirling into pancakes, this delightful duo elevates any dish to dessert perfection. Plus, the beautiful marbling adds an irresistible visual appeal, making your creations not just delicious but stunning too.
You can whip up this indulgent treat in no time, impressing friends or simply treating yourself. So grab your chocolate and peanut butter, and get ready to create a sweet masterpiece that’ll have everyone coming back for seconds! You won’t regret it.
Frequently Asked Questions
Can I Use Dark Chocolate Instead of Milk Chocolate?
Yes, you can use dark chocolate instead of milk chocolate. Just keep in mind that the flavor will be richer and less sweet. Adjust the sweetness in your recipe to balance it out if needed.
What Type of Peanut Butter Works Best for Swirling?
Creamy peanut butter works best for swirling, as its smooth texture blends easily with chocolate. If you prefer a bit of crunch, go for crunchy peanut butter, but stick to a natural brand for optimal flavor.
How Long Can I Store the Chocolate-Peanut Butter Mix?
You can store the chocolate-peanut butter mix in the fridge for up to two weeks. Just make sure it’s in an airtight container to keep it fresh and delicious for all your tasty treats!
Can I Add Other Flavors to the Swirl?
Yes, you can definitely add other flavors to the swirl! Experiment with vanilla, mint, or even caramel. Just mix them in gently to create a deliciously unique treat that suits your taste. Enjoy your creation!
Is This Recipe Suitable for Those With Nut Allergies?
No, this recipe isn’t suitable for those with nut allergies. It contains peanut butter, which can trigger allergic reactions. Always check ingredient labels or consider alternatives if you’re cooking for someone with nut sensitivities.
Conclusion
Now that you know how to create those creamy swirls of chocolate and peanut butter joy, it’s time to put your skills to the test! Remember to keep your ingredients at room temperature and avoid overheating the chocolate. With a little practice, you’ll master the swirl technique and impress dessert lovers everywhere. So grab your ingredients, unleash your creativity, and enjoy every delicious bite of your marbled masterpiece! Happy swirling!