
When you think about classic British baking, the butter cake often comes to mind. It’s simple yet satisfying, perfect for any occasion. You’ll appreciate how easy it is to whip up with a few essential ingredients. But before you start, let’s explore the role of butter and why it’s crucial to your cake’s texture and flavor. Understanding this can elevate your baking game significantly. Ready to get started?
What Is Butter’s Role?
Butter plays a crucial role in making a delicious butter cake. It adds richness and depth to the flavor, making each bite satisfying.
When you cream butter with sugar, you create tiny air pockets that help your cake rise and become light and fluffy. This step’s essential because it affects the cake’s texture.
Moreover, butter contributes to moisture, keeping the cake tender. Using room temperature butter ensures it mixes evenly, giving you a uniform batter.
The fat in butter also helps to form a golden crust, enhancing the cake’s appearance.
In short, butter isn’t just an ingredient; it’s the heart of your butter cake, ensuring it’s flavorful, moist, and irresistibly inviting. You’ll taste the difference!
Essential Baking Elements
To create a delicious butter cake, you need to focus on essential baking elements. These components not only enhance flavor but also ensure your cake has the perfect texture.
Let’s explore the key ingredients that make your cake truly stand out.
- Flour
- Sugar
- Eggs
- Baking powder
Key Baking Components
When you’re baking a butter cake, understanding the key components is essential for achieving that perfect texture and flavor. Here are the four main elements you should focus on:
- Butter: Use high-quality, unsalted butter for the best flavor. It’s the star of your cake.
- Sugar: Granulated sugar not only sweetens but also helps create that light, airy texture by incorporating air when creamed with butter.
- Flour: All-purpose flour gives structure. Sifting it can help avoid lumps and ensure even distribution.
- Eggs: Eggs add moisture and richness. They also act as a binding agent, helping your cake rise beautifully.
Flavor Enhancements
Ever wondered how to elevate your butter cake from delicious to extraordinary? Flavor enhancements can truly make a difference. Here are some simple yet effective ways to boost that cake’s flavor:
- Vanilla Extract: A splash of high-quality vanilla extract adds depth and warmth.
- Citrus Zest: Grate some lemon, orange, or lime zest for a refreshing zing.
- Almond Extract: Just a few drops can give your cake a delightful nutty undertone.
- Spices: Consider adding a pinch of cinnamon or nutmeg for a comforting aroma.
Incorporating these elements not only amplifies the taste but also creates a memorable experience.
Enjoy experimenting and find the perfect combination that suits your palate!
Detailed Baking Instructions
Now that you’ve got your essential ingredients ready, it’s time to get into the baking process.
Start by mixing everything until it’s creamy, creating that rich texture you love.
Finally, we’ll arrange the cake slices perfectly to showcase your delicious creation.
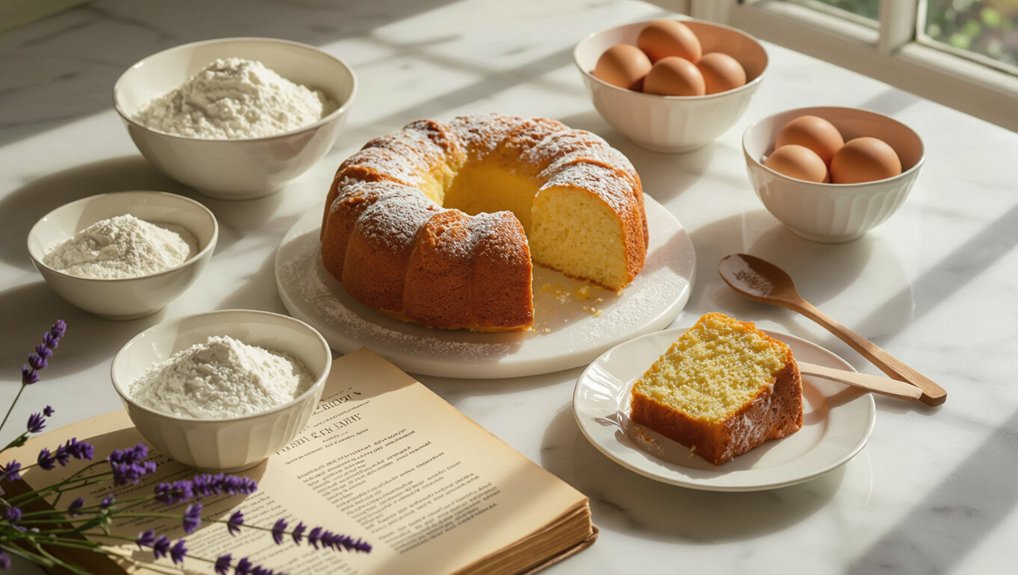
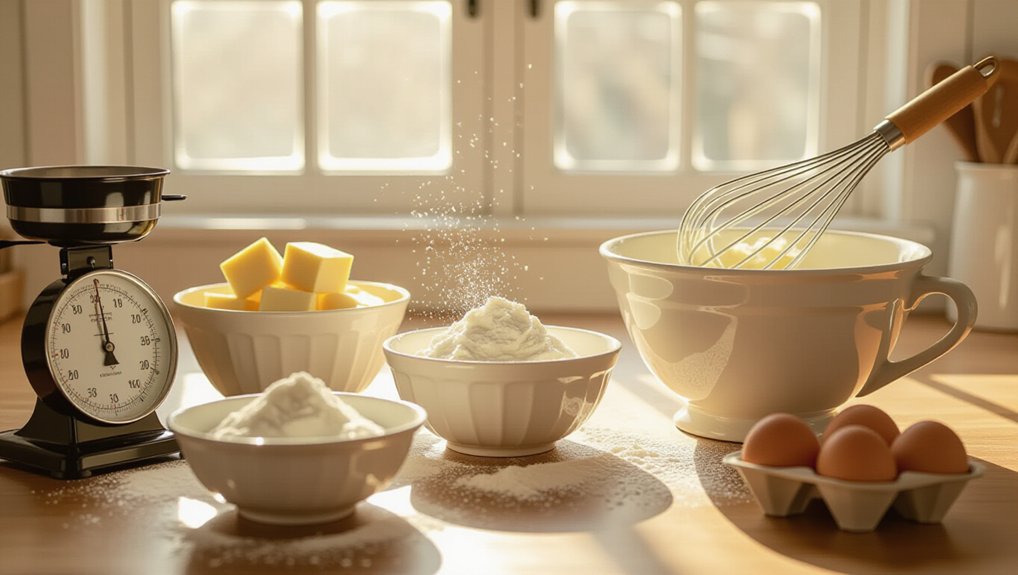
Gather All Ingredients First
Gathering all your ingredients before you start baking is crucial for a smooth process. You won’t want to be scrambling around the kitchen when you’re in the zone!
Make sure you have everything on hand, so you can focus on creating that perfect butter cake. Here’s a quick list of what you’ll need:
- Unsalted butter – for that rich flavor and moist texture.
- Granulated sugar – to sweeten your cake beautifully.
- All-purpose flour – the base for your cake’s structure.
- Eggs – to bind everything and add lightness.
Once you’ve gathered these essentials, you’ll be ready to dive into the mixing process.
Happy baking!
Mix Until Creamy
Start by creaming the unsalted butter and granulated sugar together in a mixing bowl. Use an electric mixer on medium speed, mixing until the mixture is light and fluffy—this usually takes about 3-5 minutes.
Make sure to scrape down the sides of the bowl occasionally to incorporate all the ingredients evenly. Once you achieve a creamy texture, it’s time to move on to the next step.
Here’s what you should focus on:
- Use room temperature butter for easier mixing.
- Ensure your sugar is free of lumps for a smooth blend.
- Don’t rush; take your time to achieve that airy consistency.
- Taste a small bit—your mixture should be sweet and buttery!
Cake Slice Arrangement
After achieving that creamy texture, it’s time to pour the batter into prepared cake pans. Once baked and cooled, you’ll want to arrange your cake slices beautifully. Here’s how to do it:
- Level the Cakes: Use a serrated knife to trim the tops, ensuring they’re flat for stacking.
- Layer Wisely: Start with one layer, spreading a generous amount of frosting in between each layer.
- Chill Before Slicing: Refrigerate the assembled cake for at least 30 minutes to set the layers.
- Slice with Precision: Use a sharp knife or cake cutter for clean, even slices, and wipe the blade between cuts for a tidy finish.
Enjoy your perfectly arranged butter cake slices!
Ingredients List
Classic British Butter Cake Recipe
Creating a delicious butter cake begins with the right ingredients. This classic recipe is perfect for any occasion!
30 mins
45 mins
1 hr 15 mins
8
Ingredients
- 1 cup unsalted butter, softened
- 1 ½ cups granulated sugar
- 2 cups all-purpose flour
- 1 teaspoon baking powder
- Pinch of salt
- 4 large eggs
- 1 teaspoon vanilla extract
Instructions
- Preheat your oven to 350°F (175°C).
- In a large mixing bowl, cream together the softened butter and sugar until light and fluffy.
- Add the eggs one at a time, mixing well after each addition.
- Stir in the vanilla extract.
- In a separate bowl, whisk together the flour, baking powder, and salt.
- Gradually add the dry ingredients to the wet mixture, mixing until just combined.
- Pour the batter into a greased cake pan and smooth the top.
- Bake for 45 minutes, or until a toothpick inserted into the center comes out clean.
- Allow the cake to cool before serving.
Use Room-Temperature Ingredients
Using room-temperature ingredients is crucial for achieving that perfect butter cake. When your ingredients are at the right temperature, you’ll notice better mixing and a fluffier texture.
Here are some key points to remember:
- Importance of Temperature Control
- Benefits of Softened Butter
- Eggs at Room Temperature
- Consistent Baking Results
Importance Of Temperature Control
When you ensure your ingredients are at room temperature, you set the stage for a perfectly baked butter cake. This temperature control is crucial because it allows your butter and sugar to cream together smoothly, creating a light and airy texture.
Cold ingredients can hinder this process, resulting in a dense cake.
Also, eggs blend more easily with room-temperature ingredients, improving the overall consistency of your batter. If you start with cold ingredients, you risk curdling the mixture or creating lumps.
To achieve the best results, take out your butter and eggs ahead of time. Planning ahead ensures everything is at the right temperature, leading to a tender, delicious cake that everyone will love.
Benefits Of Softened Butter
Softened butter is a game-changer in baking, as it allows for better mixing and incorporation of air into your batter. When you use butter at room temperature, it creams easily with sugar, creating a light and fluffy texture. This increased aeration leads to a cake that rises beautifully and has a tender crumb.
Moreover, softened butter ensures even distribution of flavors throughout your batter. When you blend it with other ingredients, you get a smooth consistency that enhances the overall taste of your cake.
It also helps in achieving a moist final product, preventing that dry, crumbly texture you want to avoid. So, don’t skip this crucial step; let your butter sit out, and watch your cake transform!
Eggs At Room Temperature
Room-temperature eggs can make a significant difference in your butter cake. When eggs are at room temperature, they blend more easily with other ingredients, creating a smoother batter. This leads to a lighter and fluffier texture in the final cake.
To quickly bring eggs to room temperature, you can place them in warm water for about 10 minutes.
Using cold eggs can cause your batter to curdle, which affects the cake’s rise and overall texture. Remember, consistency is key; room-temperature ingredients work together harmoniously.
Caloric Content per Slice
Butter cake is a delightful treat, but it’s important to know its caloric content per slice. Understanding the calories helps you enjoy it mindfully, especially if you’re watching your diet. A typical slice of classic butter cake (about 1/12 of a standard 9-inch cake) contains approximately 350 calories.
Here’s a quick breakdown:
| Component | Calories per Slice |
|---|---|
| Butter | 150 |
| Sugar | 100 |
| Flour & Eggs | 100 |
Keep in mind that variations in ingredients can change these numbers slightly. If you’re indulging, savor each bite and balance it with healthier meals throughout the day. Enjoy your baking!
Overmixing the Batter
When you mix your batter, be careful not to overdo it, as overmixing can lead to a dense, tough cake instead of the light and airy texture you desire.
To prevent this, follow these tips:
- Mix until just combined: Stop as soon as the dry ingredients are incorporated.
- Use a gentle hand: Fold the batter with a spatula rather than stirring vigorously.
- Check for lumps: It’s okay to have a few small lumps; they’ll bake out.
- Time your mixing: Aim for about 2-3 minutes of mixing once you add the flour.
Frost With Lemon Icing
Now that your butter cake is ready for frosting, consider brightening it up with lemon icing.
You can add chocolate chips for a sweet twist or top it off with fresh berries for a burst of flavor.
Both options will elevate your cake and make it truly special!
Add Chocolate Chips
Elevate your butter cake by stirring in chocolate chips just before baking. This simple addition transforms your classic treat, giving it a delightful surprise in every bite.
Here’s how to do it right:
- Choose Your Chips: Opt for semi-sweet or dark chocolate chips for a richer flavor.
- Measure Carefully: Use about 1 cup of chocolate chips for a balanced taste without overpowering the butter cake.
- Fold Gently: Carefully fold the chips into the batter to avoid breaking them, keeping the cake’s texture light.
- Bake as Directed: Follow your original baking time, keeping an eye on the cake to ensure it’s perfectly golden.
With these tips, your butter cake will be a chocolate lover’s dream!
Add Fresh Berries
Adding fresh berries to your butter cake creates a burst of flavor that’s hard to resist. The sweetness of the berries complements the rich, buttery texture beautifully.
Here’s how to incorporate them for a delightful treat:
- Select Your Berries: Choose vibrant options like strawberries, blueberries, raspberries, or blackberries for the best results.
- Prepare the Berries: Rinse and dry them thoroughly to avoid excess moisture in your cake.
- Fold Into Batter: Gently mix the berries into your butter cake batter before baking. This ensures even distribution and a lovely presentation.
- Frost with Lemon Icing: Once cooled, drizzle a tangy lemon icing over the cake to enhance the berry flavors and add a zesty finish.
Enjoy your delicious creation!
Common Baking Inquiries
Baking can be tricky, and you might run into some common mistakes along the way.
Whether you’re unsure about ingredient substitutions or how to store your cake, don’t worry—you’re not alone!
Let’s tackle these common inquiries to help you achieve the perfect butter cake.
Common Baking Mistakes
While you might think baking is straightforward, common mistakes can easily derail your butter cake. One of the biggest pitfalls isn’t measuring ingredients accurately. A little too much flour or sugar can throw off the texture.
Another mistake is skipping the creaming process; it’s crucial for incorporating air into the batter, ensuring a light, fluffy cake. Don’t forget to preheat your oven—baking in an unheated oven can lead to uneven results.
Also, avoid opening the oven door too often; this can cause temperature fluctuations. Lastly, let your cake cool completely before removing it from the pan to prevent breakage.
Ingredient Substitutions Explained
How can you achieve a delicious butter cake if you’re missing a key ingredient? No worries! You can often swap ingredients without sacrificing flavor or texture.
For example, if you’re out of butter, try using equal parts margarine or coconut oil. If you need a dairy-free option, almond or soy milk can replace regular milk.
For eggs, unsweetened applesauce or mashed bananas work well—use a quarter cup for each egg.
If you lack all-purpose flour, cake flour or a gluten-free blend can be great substitutes.
Storage Tips For Cakes
To keep your butter cake fresh and delicious, it’s essential to store it properly. First, let the cake cool completely before wrapping it.
Use plastic wrap or aluminum foil to cover it tightly, preventing air exposure that can lead to dryness. If you’ve frosted your cake, consider placing it in an airtight container to protect the icing.
For longer storage, you can freeze your cake. Just slice it beforehand, wrap each piece in plastic wrap, and then place them in a freezer bag.
Thaw slices at room temperature when you’re ready to enjoy. If stored correctly, your butter cake can last up to a week at room temperature or several months in the freezer.
Happy baking!
Perfect With Afternoon Tea
Butter cake pairs beautifully with afternoon tea, creating a delightful experience that elevates any gathering. As you pour your favorite tea, the rich aroma of the cake complements the warm, comforting notes of the brew.
The cake’s buttery texture and subtly sweet flavor make it the perfect companion to both black and herbal teas. You can enhance the experience by adding a dollop of clotted cream or a sprinkle of fresh berries.
Consider serving slices alongside delicate sandwiches or scones for a truly British touch. Whether you’re hosting friends or enjoying a quiet moment, butter cake brings a touch of elegance to your tea time.
Frequently Asked Questions
Can I Substitute Butter With Margarine in This Recipe?
Yes, you can substitute butter with margarine in this recipe. Just keep in mind that the flavor and texture might differ slightly. Use a stick variety for the best results, and adjust as needed.
How Can I Tell When the Cake Is Fully Baked?
You can tell the cake’s fully baked by inserting a skewer in the center; it should come out clean. Also, check for a golden-brown color and a slight spring when you gently press the top.
What Size Cake Pan Should I Use?
You should use an 8-inch round cake pan for a classic British butter cake. This size ensures even baking and gives you the perfect height for a deliciously rich and moist cake. Enjoy your baking!
Can I Add Fruit or Nuts to the Batter?
Yes, you can add fruit or nuts to the batter! Just make sure to adjust the quantity slightly, so the cake maintains its texture. Chopped nuts or dried fruit work best for even distribution. Enjoy experimenting!
How Should I Store Leftover Cake?
You should store leftover cake in an airtight container at room temperature for up to three days. If you want it to last longer, refrigerate it, but let it come to room temperature before serving.
Conclusion
Making a Classic British Butter Cake is a delightful experience that brings warmth to any occasion. You’ve learned how to balance the ingredients and avoid common pitfalls, ensuring a perfect bake every time. Whether you enjoy it plain or dressed up with lemon icing and berries, this cake is sure to impress. So, gather your ingredients, follow the steps, and treat yourself and your loved ones to a slice of this timeless delight. Happy baking!