
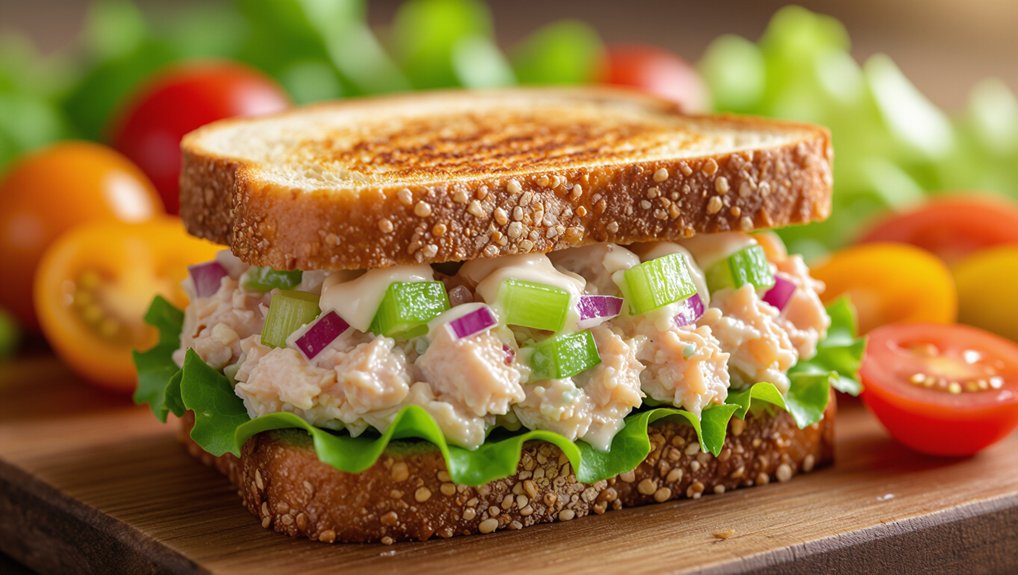
When you think about making the ultimate tuna sandwich, the quality of your ingredients is key. Start with sustainably sourced tuna and the right mix-ins to elevate the flavor. You’ll want to balance texture and taste, ensuring every bite is satisfying. But there are a few common pitfalls to avoid, and some unexpected additions that can take your sandwich to the next level. Let’s explore how to create something truly special.
Tuna Sandwich Essentials
To craft a delicious tuna sandwich, you’ll need a few key ingredients. First, grab some quality tuna, either fresh or canned, depending on your preference.
Next, pick your bread; hearty whole grain or soft white works well. You’ll also want mayonnaise for creaminess, but feel free to substitute Greek yogurt for a healthier twist.
Don’t forget to add diced celery for crunch and some salt and pepper for flavor. For extra zing, consider mixing in a squeeze of lemon juice or a dash of mustard.
Finally, add leafy greens like lettuce or spinach to brighten up your sandwich. With these essentials, you’re on your way to creating a tasty tuna sandwich that satisfies your cravings!
Freshly Canned Tuna
When you’re making a tuna sandwich, the quality of your canned tuna can make all the difference. You want to choose tuna fillets that are fresh and flavorful, and don’t forget to enhance your sandwich with some tasty boosters.
Here are some tips to elevate your tuna experience:
- Look for sustainably sourced tuna.
- Opt for chunk light or solid white for texture.
- Add a splash of lemon juice for brightness.
- Mix in herbs like dill or parsley for extra flavor.
Quality Tuna Fillets
Quality tuna fillets are the cornerstone of any great tuna sandwich. When you choose the right tuna, you’ll elevate your sandwich from ordinary to extraordinary.
Look for freshly canned tuna that’s packed in water or olive oil for the best flavor and texture. Here are four tips to ensure you’re picking the best:
- Check the label: Look for tuna that’s sustainably sourced and free from additives.
- Opt for chunk or solid: These cuts provide firmer texture and hold up better in your sandwich.
- Choose lighter varieties: Albacore or skipjack tuna often have milder flavors that blend well.
- Inspect the color: Bright, clean fillets indicate freshness, while dull colors might signal age.
Enjoy making your ultimate tuna sandwich!
Flavor Boosters
A few simple flavor boosters can transform your freshly canned tuna into a mouthwatering sandwich. By adding just a few ingredients, you’ll elevate the taste and make every bite unforgettable.
Here are four flavor boosters you should try:
- Dijon Mustard: A spoonful adds tanginess and depth.
- Fresh Herbs: Chopped dill, parsley, or chives brighten the mix.
- Crispy Vegetables: Celery or red onion adds crunch and freshness.
- Lemon Juice: A splash enhances the flavors and adds zest.
Mix these into your tuna before assembling your sandwich, and you’ll create a dish that’s bursting with flavor.
You’ll never look at a tuna sandwich the same way again!
Tuna Mixture Assembly Steps
Now that you’ve got your freshly canned tuna, it’s time to put together the perfect mixture.
Start by chopping and mixing your ingredients thoroughly to ensure every bite is flavorful.
Finally, add a touch of freshness by garnishing with herbs to elevate your tuna blend.
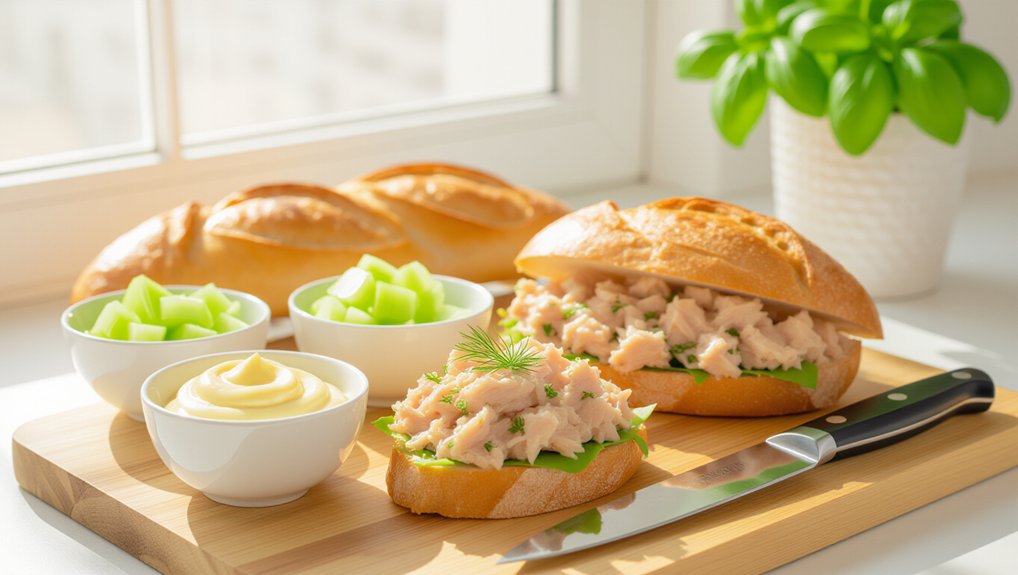
Ingredient Chopping and Mixing
Start by finely chopping your vegetables to create a flavorful base for your tuna mixture. This step adds crunch and freshness, making your sandwich irresistible.
Here’s what you’ll need to chop:
- Celery – Adds a nice crunch and mild flavor.
- Red onion – Offers a touch of sweetness and a bit of bite.
- Pickles – Brings in tanginess that complements the tuna.
- Bell pepper – Provides color and a hint of sweetness.
Once you’ve chopped everything, make sure to gather them in a bowl.
This vibrant mix will enhance the overall taste and texture of your tuna sandwich.
Mixing Ingredients Thoroughly
With your chopped vegetables ready, it’s time to combine them with the star of the show: tuna. To create a flavorful mixture, follow these steps:
- Add mayo: Spoon in your preferred amount of mayonnaise, ensuring a creamy texture.
- Incorporate seasonings: Sprinkle in salt, pepper, and any other spices you enjoy, like garlic powder or paprika.
- Mix well: Use a fork to gently fold the ingredients together until everything’s evenly coated. Be careful not to mash the tuna too much.
- Taste test: Before you move on, take a small bite. Adjust any seasonings if needed to achieve that perfect balance.
Now you’re ready for the next step in crafting your ultimate tuna sandwich!
Garnish With Fresh Herbs
To elevate your tuna mixture, consider adding fresh herbs, which can bring a burst of flavor and freshness. Herbs not only enhance taste but also add a vibrant touch to your sandwich.
Here’s how to incorporate them:
- Chopped Parsley: Adds a mild, earthy flavor that complements tuna perfectly.
- Dill: Offers a slightly tangy taste, enhancing the overall profile of your mixture.
- Chives: Provides a subtle onion-like flavor, brightening the dish without overpowering it.
- Basil: Adds a sweet and aromatic note, which can elevate your sandwich to new heights.
Simply fold one or more of these herbs into your tuna mixture before assembling your sandwich.
Enjoy the fresh twist!
Quick Serving Suggestions
Elevated Tuna Sandwich
Transform your tuna sandwich into a delightful meal with these quick serving suggestions.
Ingredients
- 1 tuna sandwich
- Mixed greens
- Cherry tomatoes
- Light vinaigrette
- Crispy potato chips
- Bowl of tomato soup
- Slices of pickle or jalapeños
- Iced tea or lemonade
Instructions
- Prepare your tuna sandwich as desired.
- Assemble a crisp side salad with mixed greens and cherry tomatoes, drizzled with vinaigrette.
- Serve the sandwich with a side of crunchy potato chips.
- For warmth, heat a bowl of tomato soup to enjoy alongside.
- Add a few slices of pickle or jalapeños for an extra kick.
- Finish with a refreshing drink like iced tea or lemonade.
Chill Ingredients for Better Flavor
Chilling your ingredients can really elevate the flavor of your tuna sandwich. When everything’s at the right temperature, it enhances taste and improves the texture.
Here are some tips to get the most out of your chilling process:
- Use cold tuna for a fresher taste.
- Chill your mayo for a creamier feel.
- Keep veggies crisp by refrigerating them.
- Serve on cool bread for the best bite.
Optimal Temperature For Tuna
When you want to elevate the flavor of your tuna sandwich, consider chilling your ingredients beforehand. Tuna, when served cold, offers a firmer texture and a more refreshing taste. Aim to keep your canned tuna in the fridge for at least an hour before you mix it into your sandwich. This slight chill enhances the overall experience, making each bite more satisfying.
Don’t forget to chill your other ingredients, too! Lettuce, tomatoes, and any spreads can benefit from lower temperatures. This not only preserves their crunch but also adds a refreshing contrast to the savory tuna.
Enhance Flavor With Chill
Serving your tuna sandwich cold isn’t just about temperature; it’s about enhancing the overall flavor. Chilling your ingredients can elevate the taste experience, making each bite more refreshing and vibrant.
Start with cold tuna right from the fridge; it helps lock in flavors and keeps the sandwich crisp.
Add cold, diced vegetables like celery, red onion, and bell peppers for a crunchy texture and a burst of freshness. You can also incorporate cold condiments, like mayonnaise or mustard, which blend better when chilled.
Don’t forget to chill your bread briefly, too; it can add a satisfying coolness.
Perfecting Texture Through Cooling
To achieve the perfect texture in your tuna sandwich, consider the benefits of using chilled ingredients. When you chill your tuna, mayonnaise, and even veggies, you enhance their crispness and flavor. Cold ingredients not only keep your sandwich refreshing but also help maintain that satisfying crunch.
Start by refrigerating your canned tuna and mayonnaise for at least an hour before mixing. Dice your celery and onion and chill them too; this adds a delightful crunch.
When you assemble your sandwich, the coolness from the ingredients contrasts beautifully with the warm, toasted bread. This temperature difference creates a mouthwatering experience that elevates your tuna sandwich to new heights.
Enjoy that perfect blend of textures with each bite!
Caloric Content per Serving
A typical tuna sandwich packs around 300 to 500 calories per serving, depending on the ingredients you choose. The type of bread, mayonnaise, and additional toppings can significantly influence the total caloric content. Here’s a quick breakdown of common ingredients and their average calorie counts:
| Ingredient | Serving Size | Calories |
|---|---|---|
| Whole Wheat Bread | 2 slices | 160 |
| Mayonnaise | 1 tablespoon | 100 |
| Tuna (canned) | 1 can (5 oz) | 200 |
| Lettuce | 1 leaf | 1 |
Overmixing the Tuna Mixture
When preparing your tuna sandwich, it’s important to handle the tuna mixture with care. Overmixing can lead to a mushy texture, ruining your sandwich’s appeal.
To keep that perfect consistency, follow these tips:
- Use a fork: Gently flake the tuna instead of mashing it.
- Add ingredients gradually: Mix in mayo, relish, or other add-ins slowly to avoid overmixing.
- Test as you go: Stop mixing once everything is combined, but still chunky.
- Consider your mix-ins: Large chunks of celery or onion can add texture, so don’t overwork the mixture.
Add Avocado Slices
To elevate your tuna sandwich, adding avocado slices brings a creamy texture and rich flavor.
You can also kick it up a notch with spicy jalapeño peppers or crunchy pickles for an exciting twist.
Let’s explore how these toppings can enhance your sandwich experience!
Add Spicy Jalapeño Peppers
Spice up your tuna sandwich by adding jalapeño peppers for a fiery kick. These vibrant peppers not only enhance flavor but also bring a delightful heat that’ll elevate your meal.
Here’s how to incorporate them perfectly:
- Choose Your Peppers: Opt for fresh or pickled jalapeños based on your heat preference.
- Slice Thinly: Cut the peppers into thin rings for even distribution and easier biting.
- Mix with Tuna: Fold the sliced jalapeños into your tuna mixture for a balanced flavor.
- Taste Test: Start with a small amount and adjust according to your spice tolerance.
Adding jalapeños will transform your sandwich into a bold, exciting dish you won’t forget!
Enjoy that extra zing!
Add Crunchy Pickles
Adding crunchy pickles can take your tuna sandwich to the next level, just like jalapeños do. The satisfying crunch balances the creamy tuna, creating an irresistible bite.
Here’s how to incorporate them perfectly:
- Choose Your Pickles: Opt for dill, bread and butter, or spicy pickles based on your taste preference.
- Chop Them Fine: Dice the pickles into small pieces to evenly distribute the flavor throughout the sandwich.
- Mix with Tuna: Fold the chopped pickles into your tuna mixture for a delightful surprise with each bite.
- Layer on the Bread: If you prefer, layer whole slices directly on the bread for extra texture.
Don’t skip this step—your taste buds will thank you!
Tuna Sandwich Storage Tips
To keep your tuna sandwich fresh, you need to store it properly.
Use the right containers and know how long it lasts in the fridge.
These tips will help you enjoy your sandwich at its best!
Proper Refrigeration Techniques
When you store your tuna sandwich, proper refrigeration is crucial to maintain its freshness and safety. First, wrap your sandwich tightly in plastic wrap or aluminum foil to prevent air exposure, which can lead to sogginess.
If you’re not eating it right away, place it in the fridge within two hours to keep bacteria at bay. Set your refrigerator to 40°F (4°C) or lower, as this temperature slows down spoilage.
Avoid storing your sandwich in the door; instead, keep it on a middle shelf for a more consistent temperature. If your sandwich has toppings like lettuce or tomato, consider adding them just before eating to keep everything crisp.
Following these steps ensures your tuna sandwich stays delicious until you’re ready to enjoy it.
Ideal Container Choices
Choosing the right container can make all the difference in keeping your tuna sandwich fresh. Opt for an airtight container to prevent air exposure, which can cause the sandwich to dry out or spoil. Glass or BPA-free plastic containers work well.
If you’re packing your sandwich for later, consider wrapping it in parchment paper before placing it in the container; this adds an extra layer of protection. For short-term storage, a reusable sandwich bag can be handy, but ensure it seals tightly.
If you’re planning to eat your sandwich on the go, a lunchbox with compartments can keep ingredients separate and fresh. Remember, the better the container, the tastier your sandwich will be when you’re ready to enjoy it!
Shelf Life Guidelines
While enjoying a tuna sandwich is a delightful experience, knowing how long it stays fresh is crucial for your health and taste.
Typically, a homemade tuna sandwich can last about 3 to 4 hours at room temperature. If you’ve stored it in the fridge, aim to consume it within 1 to 2 days for optimal flavor and safety.
Always keep it in an airtight container to prevent drying out. If you notice any off smells or changes in color, it’s best to toss it.
For extended storage, consider freezing the filling separately and assembling the sandwich later.
Perfect Bread Choice Matters
The right bread can elevate your tuna sandwich from ordinary to extraordinary. Choose a sturdy bread like sourdough or whole grain; they hold up well against the moisture of the tuna mix.
If you prefer something soft, a fresh baguette or ciabatta can add a delightful crunch. Avoid flimsy white bread—it’s likely to fall apart before you finish your sandwich.
Consider toasting your bread for added texture and warmth. A little crunch can make each bite more enjoyable.
Don’t forget about flavor; a bread with herbs or seeds can complement your tuna perfectly. Ultimately, experiment to find what you love best. Your choice in bread not only impacts the taste but also the overall experience of your ultimate tuna sandwich.
Frequently Asked Questions
Can I Use Frozen Tuna Instead of Canned Tuna?
Yes, you can use frozen tuna instead of canned tuna. Just thaw it properly, cook it through, and mix it with your favorite ingredients. You’ll get a fresh and flavorful result you’ll love!
What Are Some Gluten-Free Bread Options for My Sandwich?
You can try gluten-free options like almond flour bread, coconut flour bread, or chickpea bread. Many stores also offer gluten-free whole grain or sourdough varieties. Just make sure to check the labels for quality!
How Can I Add More Protein to My Tuna Sandwich?
You can add more protein to your tuna sandwich by mixing in Greek yogurt, cottage cheese, or chopped hard-boiled eggs. You could also layer in some sliced turkey or sprinkle nuts for extra crunch.
What Are Some Common Tuna Sandwich Variations Around the World?
You’ll find tuna sandwiches varied globally—try the Mediterranean version with olives and capers, the Japanese with wasabi and mayo, or the South American twist featuring avocado and cilantro. Each adds unique flavors and textures!
Can I Make a Tuna Sandwich Ahead of Time?
Yes, you can make a tuna sandwich ahead of time. Just store it in an airtight container in the fridge. Keep the bread separate until you’re ready to eat, to maintain freshness and texture.
Conclusion
Now that you know how to create the ultimate tuna sandwich, it’s time to get cooking! Remember to use high-quality tuna and fresh ingredients for the best flavor. Don’t skip the chilling step, as it really enhances the taste. With the right bread and a few extra toppings, your sandwich will be a hit. Enjoy every bite, and feel free to experiment with your own twists to make it uniquely yours! Happy sandwich-making!